HOW TO GROW POINSETTIAS

How to grow poinsettias

Native to Mexico and Guatemala, the poinsettia - Euphorbia pulcherrima, is a popular ornamental houseplant grown for the seasonal Christmas period. Also known as the Christmas star, it is noted for its dark-green foliage and rosettes of large, red bracts. The poinsettia has been associated with Christmas since the 17th century when Franciscan friars decorated their altars with the colourful stems.

How to grow poinsettias - https://herebydesign.net/
The poinsettias natural habitat are deciduous tropical forests, which put it at odds to the cold freezing temperatures experienced at Christmas time in northern Europe. Extreme temperatures, cold draughts and irregular watering are all known to cause leaf drop in poinsettias which is why they have a reputation for being difficult to care for.

Poinsettias require a stable minimum temperature of approximately 13-15°C. Even short periods of lower temperatures can cause environmental shock which can cause the plant to react by dropping its leaves. This exposure should be kept to a minimum, so making sure that they are well protected and covered when purchasing. Unfortunately it is not uncommon for plants to be chilled in transit from the growers prior to purchase.

How to grow poinsettias - http://www.naturemuseum.org/
When choosing your plant, favour specimens which have tightly closed flower buds and avoid those where the yellow pollen is visible on the flower clusters. This is because the red bracts will begin to naturally drop off once the plant has finished flowering

Once home place in a warm, bright position, but one which is out of direct sun. Avoid draughts, radiators and moving them between hot and cold temperatures too quickly.

Careful watering is particularly important as poinsettias are prone to root damage from waterlogged conditions. Of course the foliage will also wilt if kept to dry, so only water when the surface of the compost has begun to dry out.

Feed with a good quality houseplant fertiliser and mist regularly with tepid water to help extend the flowering period.

For related articles click onto the following links:
HOW TO GROW AECHMEA FASCIATA
HOW TO GROW POINSETTIAS
HOW TO GROW STROMANTHE SANGUINEA 'Triostar'
HOW TO GROW THE SWISS CHEESE PLANT - Monstera deliciosa
How to Care for Poinsettias
HOW TO TAKE CUTTINGS FROM POINSETTIA
POINSETTIA PESTS AND DISEASES
THE CHRISTMAS ROSE - Helleborus niger
THE HISTORY OF CHRISTMAS
THE PLANT HUNTERS
WHY IS MY POINSETTIA DROPPING ITS LEAVES?

WHY IS MY POINSETTIA DROPPING ITS LEAVES?


Poinsettias - Euphorbia pulcherrima, are a gorgeous addition to the Christmas table and as part of the seasonal floral decoration in general. Native to the tropical forests of Mexico and Guatemala, the plant's association with Christmas began in the 16th-century. Franciscan friars believed that the star-shaped leaf pattern symbolized the Star of Bethlehem, while the red coloured bracts represented the blood sacrifice of Jesus while he was on the cross.

When you take a tropical plant such as the poinsettia and expose it to the freezing temperatures of an English winter it is not surprising that some physical damage will occur as a result of environmental stress. For poinsettias, the typical reaction is to drop its leaves. Growers, transportation and retailers all make an effort to maintain suitable temperatures, although this is not always achieved. That being said, it is not only extremes of temperature that can cause this characteristic problem.

What causes leaf drop in poinsettias

Poinsettia leaf drop - http://www.iva.de/profil-online/haus-garten/
1. As previously mentioned, poinsettias will be prone to leaf drop if they become chilled. This typically happens when they has been unloaded for delivery and then left outside, or if a plant is placed in the boot of a car during cold to freezing temperatures. Poinsettias will need a minimum temperature of 13-15°C (55-59°F).

2. Assuming that the plants are in good condition when purchased, make sure that they are well wrapped before leaving the store and always transport inside the passenger area of the car and not the boot. Avoid buying from street stands or from outside retailers, and with regards to wrapping cover the plant right around the top of the foliage, or put it in a plastic bag so that it is completely protected.

3. An obvious one perhaps but once home do not place your poinsettia on a cold windowsill. Equally, do not place next to a strong heat source such as a radiator.

4. Be aware that poinsettias will naturally drop some leaves once flowering has finished. The ornamental red bracts are not true flowers but are instead a rosette of specialised leaves. If you look closely in the centre of the bracts the true flowers can be viewed. The flowers should be in tight bud when purchased to ensure the plant remains in good condition for as long as possible.

5. Watering can also be a factor in leaf drop. As poinsettias are from the genus Euphorbia (well known for its drought tolerant species), water sparingly as overwatering can easily damage plants roots. This will again trigger the poinsettia to drop its leaves. As a rule of thumb, only water poinsettias when the surface of the compost has begun to dry out. Do not allow the compost to dry out completely.

6. Avoid placing in a draught, and in particular cold draughts.

For related articles click onto the following links:
How to Care for Poinsettias
HOW TO GROW POINSETTIAS
HOW TO TAKE CUTTINGS FROM POINSETTIA
POINSETTIA PESTS AND DISEASES
THE CHRISTMAS ROSE - Helleborus niger
THE HISTORY OF CHRISTMAS
WHY DO POINSETTIAS DROP THEIR LEAVES

HOW TO GROW MAMMILLARIA FROM SEED

How to grow Mammillaria from seed - image credit Ryan Benoit


The majority of species and cultivars can be propagated from cuttings or offsets, however all can be easily grown from seed. Just be aware that selected cultivars and hybrids will not grow true to the parent plants.

Mammillaria fruits and seeds
All Mammillaria seeds are small; in fact they will seldom exceed 1 m in diameter or length. So to make sowing easier use a toothpick with the tip moistened to lift each seed and set it in place on the compost. For very fine seed mix well in with some fine, dry, silver sand, and sow the seed/sand mix across the surface of the compost.

Using a good quality cactus compost, fill suitable pots, pan or a modular seed tray to 1-2 cm from the top of the pot. If proprietary composts are not available then you can consider creating your own mix using 1 part of loam based compost (John Innes No 3), 1 part washed, sharp sand and 1 part of fine vermiculite. Mix thoroughly and then put through a 5mm sieve.

Newly germinated Mammillaria seedlings
Good quality proprietary composts should all have been heat treated prior to packing to ensure the product is sterile. If you are keen to maintain sterile condition, and even then only using only plastic products, place the filled pots into a tray and carefully add boiling hot water to the compost until the water reaches to just below the rim of the pots. Leave to stand until the compost in the pot has become soaked through. Avoid boiling plastic pots as they can become misshapen, instead clean with a bleach solution before rinsing thoroughly. Previously used terracotta pots can be boiled, but only by starting off in cool to warm water before heating up. Adding terracotta pots directly in to boiling water can cause them to crack.

How to grow Mammillaria from seeds
Once cooled, the seeds can be sown sparsely onto the surface of the compost and then pressed into the surface. Do not bury the seed. Add a thin layer of vermiculite to the surface of the compost to help prevent the seeds from moving when watered. Water gently in and continue to keep the water moist throughout the germination process. Never allow the compost to become waterlogged. Tap water is preferable to rainwater.

Move the pots or trays to a heated propagator and maintain a temperature of between 75 and 85 degrees Fahrenheit. With fresh seed you can expect a germination rate of between 40-50% with the first seedlings emerging after 5-7 days, and then with the rest appearing after 4 weeks. Older seeds will have a lower rate of germination and can take up to a month before they start to emerge.

Unlit they are about 3mm wide the seedlings will be just featureless green globules, but after after a month the first signs of spines will appear at the top. pricking out should not be attempted until at least a year has passed. By thus time the seedlings will be robust enough to withstand handling without too much risk of root damage. When replanting take care to ensure that the soil level is not higher than it was in its original container.

For related articles click onto the following links:
HOW TO GROW MAMMILLARIA FROM SEED

HOW TO GROW AFRICAN MARIGOLDS

How to grow African Marigolds

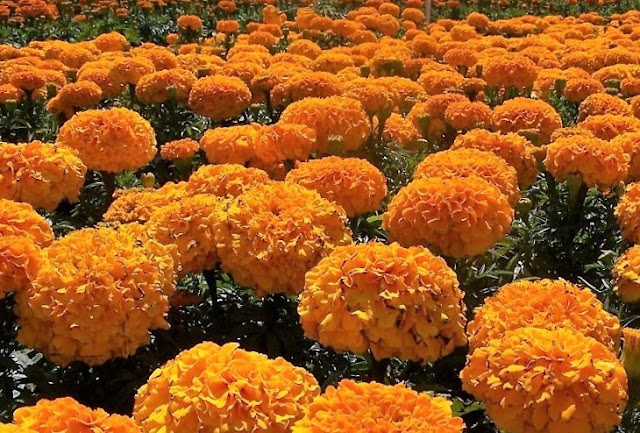
Closely related to the magnificent sunflower, the African marigold - Tagetes erecta is a comparatively sturdy species with upright growth, aromatic foliage and showy blooms. The common name however is surprisingly misleading. Rather than Africa, the African marigold is actually a native to Mexico - where it is more appropriately known as the Aztec marigold.

How to grow African marigolds
The African marigold is a popular ornamental, half-hardy annual garden plant with double flower-heads which under favorable conditions can be expected to grow to approximately 30 cm. That being said some cultivars can grow up to 50 cm! It has a well-branched, erect habit (hence the species name) with dark-green, deeply-cut foliage.

The blooms are approximately 5 cm across and can come in a variety of colours ranging from creamy-white to lemon-yellow to a deep orange. The flowers usually appear in July and will continue to bloom until the first frosts.

African marigolds will grow well in any well-cultivated site, even in poor, rather dry soil. However for best performance plant into a moderately rich soils in an open sunny position.

You do not need to deadhead African Marigolds, in order to promote further blooms but it will keep a tidier look to the plants as well as improve the growth habit and flower size.

For those growing African marigolds F1 hybrids under protection, you can encourage them to bloom earlier as well as for longer by limiting their light period to 8 hours a day for 30 days during the seedling period.

In bedding displays plant African marigolds 30 cm apart. Be aware that young plants can be prone to attack from slugs and snails, but this incidence is reduced as the plants mature. The spent flower heads can also be susceptible to grey mold in wet weather.

For related articles click onto the following links:
HOW TO GROW CORNFLOWERS FROM SEED
HOW TO GROW OSTEOSPERMUM FROM SEED

HOW TO GROW A CHRISTMAS TREE FROM SEED

How to grow a Christmas tree from seed

The common name 'Christmas tree' encompasses a large rage of both genera and species, in fact unscrupulous dealers will name any tree as a 'Christmas tree' if they think that it will encourage sales. That being said, most Christmas trees are conifers and as such will require similar growing conditions. So when it come to growing a Christmas tree from seed the same technique can usually be applied across the genera.

Root trainer torpedo pot
Arguably the most popular Christmas tree species, at least in England, is the good old Picea abies, commonly known as the Norway spruce, and closely followed by the Nordmann fir. In the United States you are more likely to find the Fraser or Douglas fir.

The key to the successful cultivation of conifer seeds of to use either deep modular seed trays (root trainer pots) or long-tom pots. This is because conifers seedlings have deep roots. Use shallow pots and trays and the roots will spiral, affecting their continual growth.

Conifer seeds are best sown from February to March. Using a good quality compost such as John Innes 'Seed and Cutting', fill your seed containers to approximately 1 cm from the top. Sow one seed per container and apply a thin covering of horticultural grit or vermiculite. Gently water in so that the seeds are not disturbed and place outside into a cold frame. Come the following spring, root trainer seedlings can either be potted on into 2-3 litre pots containing a soil-based, ericaceous compost or planted outside into nursery beds with a 1-1.5 metre spacing. Pot grown specimens can be potted on as necessary, while open ground plants can be grown on for 2-3 years before being moved to their final position.

To create the typical Christmas tree shape it is essential to maintain a single leader. If forking or competing side shoots occur, the shoot furthest away from the main axis should be removed flush to the truck in March or April. To produce the even, compact, pyramidal shape, lightly trim each year, again in March or April.

For related articles click onto the following links:
CAN I GROW A CHRISTMAS TREE FROM SEED?

HOW TO GROW WINTER JASMINE

How to grow Winter Jasmine


The are few winter flowering plants available for northern European climates but the Winter Jasmine - Jasminum nudiflorum is one of the best. However unless given favorable growing conditions it can prove to be a rather weak and untidy specimen. This is because rather than the climbing plant that it is usually sold as, it is instead a loosely-structured, deciduous shrub.

How to grow Winter Jasmine
Native to northern China, it was first collected for Western science in 1844 by the well-known Scottish plant hunter Robert Fortune (1812 – 1880). It was subsequently named by English botanist John Lindley FRS (1799 – 1865) and published in the Journal of the Horticultural Society of London in 1846

Under favorable conditions you can expect the winter jasmine to achieve a height and width of approximately 3 metres. It has long, arching branches, with small, trifoliate leaves.

The solitary, bright yellow flowers are  2.5cm in width and appear on the naked green stems (hence the species name) from November to February.

The Winter Jasmine is as tough as old boots and will even tolerate cold, sunless, north walls. Be that as it may the blooms are easily damaged and so it is best cultivated as a wall shrub trained against a wall (preferably south facing) to provide extra warmth and shelter. However it also works well as a ground cover plant in amenity planting schemes.

You can grow Winter Jasmine in any ordinary, well-drained soil.

When grown as a wall shrub any long or untidy growths can be cut back after flowering. Ground cover specimens can be cut back down to within 10 cm of ground level also after flowering.

Jasminum nudiflorum received the Award of Garden Merit from the Royal Horticultural Society in 1984.

For related articles click onto the following links:
HOW TO GROW WINTER JASMINE
JASMINUM BEESIANUM
JASMINUM NUDIFLORUM - The winter jasmine

HOW TO GROW THE WINTER ACONITE - Eranthis hyemalis

How to grow the winter aconite - Eranthis hyemalis

The winter aconite - Eranthis hyemalis, is a tuberous-rooted herbaceous perennial native to the woodlands of France, Italy and the Balkans. Noted for its yellow, cup-shaped blooms. it is valued as a garden plant for being one of the earliest of all flowers to appear in the spring.

How to grow the winter aconite - Eranthis hyemalis
It is considered to be a spring ephemeral plant. This refers to perennial, usually woodland plants that emerge quickly to bloom in the spring and then die back to their underground parts after a short growth and reproduction phase. This life cycle exploits the still leafless deciduous woodland canopy, when the maximum amount of sunlight can reach the woodland floor.

Growing to approximately 15 cm tall, Eranthis hyemalis bears deeply cut, pale-green leaves. The flowers are held above a collar of 3 leaf-like bracts and in the United Kingdom will appear from February onwards. The blooms close at night and reopen in the morning. On particularly cold days the flower buds will remain closed.

Eranthis hyemalis is usually purchased as bulbs in the late summer or as flowering specimens in the spring. The bulbs should be planted as soon as they are available 3 cm deep and 10 cm apart. They will perform best in a well-drained, but moisture retentive soil - preferably a heavy loam. As you would expect they will do well planted underneath deciduous trees or between shrubs in full sun to semi-shade.

Be aware that they can be difficult to establish if the soil is allowed to dry out during their spring growing period.

Eranthis hyemalis received the Royal Horticultural Society's Award of Garden Merit (AGM) in 1993. The sterile hybrid cultivar 'Guinea Gold' also gained the Award of Garden Merit in the same year.

For related articles click onto the following links:
ACONITUM NAPELLUS

HOW TO GROW THE WOLLEMI PINE

How to grow the Wollemi pine


Previously only known from the fossil record, the Wollemi pine - Wollemia nobilis is now considered to be a 'living fossil' since its discovery in 1994. It was found in a remote series of narrow, steep-sided sandstone gorges, the Wollemi National Park in New South Wales, Australia, the species genus is named in honour of the park.

Wollemi National Park
According to IUCN Red List criteria the Wollemi pine is rated as Critically Endangered (CR) as there were only approximately 100 mature specimens found after their discovery. Of course is is illegal to collect specimens or even the seeds of Wollemia nobilis from the wild, but there are plenty of vegetatively propagated examples around which can be purchased for garden use.

Warm, humid, temperate rainforests are the native habitat of the Wollemi pine, but their limited distribution means that they have only been found in deep sandstone gorges. However they have proven to be more adaptable and cold-hardy than their restricted temperate-subtropical origins suggest. There is even strong evidence to suggest they they can withstand temperatures down to below -10°C!

In 2005, hardiness trials were undertaken at Kew Gardens, London. The results indicated that ideal conditions for growing the Wollemi pine would include shallow, acidic, free-draining soils on sandstone, with plenty of organic matter. In fact the trial specimens started off in the most acidic soil (pH 4.7) ended up producing the most growth! Note that you will need to provide low nutrient levels in order to prevent forced, misshaped growth.

Wollemi pine - Wollemia nobilis
As you would expect from its rainforest origins, the Wollemi pine should ideally receive plenty of water during the growing season and be grown in 50% shade, with protection from both strong winds and sun. Be aware that while young plants will tolerate full sun, they will initially exhibit some yellow colouring. This is perfectly normal and will gradually return to green within the year once acclimatised.

Be aware that like many other Australian trees, the Wollemi pine is susceptible to the pathogenic water mould Phytophthora cinnamomi, so avoid using possibly contaminated water. Chlorinated tap is preferable but allow hose pipes to run through and wash out watering cans before use. Phytophthora cinnamomi can only be controlled and not irradiated.

When under environmental stress (such as low light, drought, overwatering or poor drainage) they can also be susceptible to attack from Fusicoccum fungal species. This is recognised as brown patches with tiny black raised spots on the leaves usually seed during warm months with plenty of rainfall. Fusicoccum fungal species on Wollemi pines can be treated using alternate applications of broad spectrum fungicides including Dithane 945 - if you can find any!

For related articles click onto the following links: