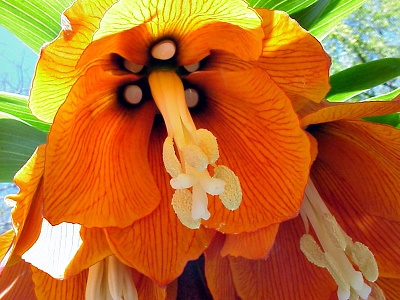
HOW TO PLANT FRITILLARY BULBS

How to plant Fritillaria bulbs

The genus Fritillaria is home to some of the most gorgeous and exotic bulbs know to European gardeners. Brightly coloured, architectural and ephemeral there is little that can compete with their fleeting splendour. However they can be tricky to grow, subject to the whims of the lily beetle and prone to rotting in the soil. So to get the best out of plants, how do you plant Fritillary bulbs?

How to plant Fritillary bulbs
To begin with you need to choose the right site as the majority of ornamental Fritillaria species and cultivars will require full sun, good drainage and positioned out the way of the extreme weather. If your plants do not receive sunlight for as much of the day as possible they will also struggle to flower. In fact your newly planted bulbs will often struggle to bloom in their first year if they are not big enough so don't make it harder for them by planting in a shady  or semi-shaded site. 

The second issue with planting fritillary bulbs is to get them in the ground without killing them later on. On the whole, Fritillaries' need good drainage as the bulbs can be prone to fungal rots. So if you do not have perfectly drained soil you will need to improve it by adding in and mixing a good amount of horticultural grit. This is also an excellent opportunity to add bone meal or fish blood and bone fertilisers to the soil below the bulbs so that the root system  can get access to valuable nutrients during the growing season. Furthermore it is a good policy to plant the bulbs on their side as water can settle in the crown increasing the risk of fungal infection. In poorly drained soils consider creating a mound to plant into to ensure that drainage is good however be aware that some Fritillaries will require a planting depth of approximately 30 cm deep!

Did I mention the optimal panting period for Fritillaria species and cultivars? No, well the end of the summer to the beginning of the autumn would be best.

For related articles click onto the following links:

Dracunculus vulgaris - The Dragonlily
HOW TO GROW THE CROWN IMPERIAL LILY
HOW TO GROW THE FOXTAIL LILY
HOW TO GROW FRITILLARIA IMPERIALIS FROM SEED
HOW TO GROW THE SNAKE'S HEAD FRITILLARY - Fritillaria meleagris
HOW TO PLANT LILY BULBS
How to Grow Native Wild Primroses and Polyanthus from Seed
How to Propagate and Grow Mistletoe
How to Propagate Box Hedging
How to Propagate the Snake's Head Fritillary
LILIUM NEPALENSE - The Lily of Nepal
Native Pond Plants
Old English Plants - Polyanthus 'Gold Lace'
RHS Snake Head Fritillary
THE GLORY LILY - Gloriosa rothschildiana

8 Top tips to help you plan your vegetable garden


Plan to grow varieties that you can’t buy in supermarkets, like multi-coloured beans!

Image: Dwarf French Bean Seeds - Colour Mix from Suttons


The start of a new year is the perfect time to reflect on last season’s successes and failures in the garden. There’s nothing quite as satisfying as sitting down with a large piece of paper and a cup of tea and dreaming about what you want to grow in the months ahead. To make sure you enjoy a long season of successful crops, here are some top tips for planning your vegetable garden from the Suttons horticultural team…

  1. Write a wishlist

Start by making a list of all the fruit and veg you’d like to grow. Consider what worked well in the past and rule out any crops that didn’t thrive in your growing environment. Don’t forget to research new vegetable seed varieties before you settle on your final choice. It might be easy to stick with what you know, but new vegetable cultivars are constantly being developed and tested to improve flavour, yields and disease resistance. 

  1. Only grow what you love to eat

It’s unlikely you’ll be able to grow everything on your wishlist, so narrow it down by prioritising your family’s favourite fruit and veg. Other things will stay on the list because the homegrown varieties taste so much better than anything you can buy (definitely broad beans!) Some vegetables are worth growing yourself because they’re cheap and easy to raise from seed but costly to buy in the supermarket. 

  1. Mind the gap!

When your list is ready, add columns for the sowing dates, planting out dates and harvest dates. A further column where you estimate the number of weeks from planting out to harvest will help you to identify any quick- growing crops that could be squeezed into gaps (like radishes that take just 3 weeks).


Summer cropping vegetables are usually started off indoors and planted out in about May when the soil warms up. But to make your veg plot productive for the longest possible time, you’ll need to remember to start your autumn and winter vegetable seeds off mid-summer, so they’re ready to plant out as soon as your other crops finish. 

  1. Draw a map of your vegetable plot

A visual map is the best way to plan your vegetable garden. Measure it accurately (you can even use squared paper and a scale) so you can see exactly how much room you have and how many plants you’ll be able to fit into the space. You should always sow a few extra seeds to allow for some to fail, or to plug unexpected gaps if something is harvested early. 

  1. Plot the plants on your map 

Add the crops to your map to ensure you’re making best use of every square inch of space. Could you squeeze some thin rows of spring onions or radishes between widely spaced rows of bigger things that take longer to grow? By the time your bigger crops have swelled to fill the space, your quick crops will already have finished. 


Start by adding vines like squash and pumpkins to the outside of your beds, as they need lots of space to spread out. Then think about the best place for crops that need support, like peas and beans, to make sure they don’t cast too much shade over sun-loving veg. Fill the remaining space with everything else. 


If you keep your map for next year, it will help you to rotate crops around the garden and avoid a buildup of pests and diseases in the soil.

  1. Don’t forget containers

Many vegetables are perfectly happy growing in containers, freeing up your plot for other things that prefer more space. If you’re struggling to fit everything in, consider what you could move to a large pot. Crops that are harvested in late summer like peppers, courgettes and tomatoes could be grown in large containers to make way for a succession of distinct, spring, summer and autumn crops with shorter growing seasons. 

  1. Order veg seeds in plenty of time

Don’t run the risk of your favourite vegetable seeds and plants selling out. Once you’ve decided what you want to grow and how much you’ll need to buy, place your order online and have it all delivered to your doorstep. 


It’s worth joining a scheme like Suttons Gardening Club before you place your order. For just £10 a year you get a 10% discount off every order, £20 worth of vouchers (4 x £5), access to exclusive special offers and seasonal tips to help you in the garden. 

  1. Organise your seeds

Make yourself a seed storage system with sections for each month. When your seeds arrive, simply place them in the appropriate section so you won’t forget to sow them when the time comes. 


It was the United States Army officer and statesman Colin Powell who said: “There are no secrets to success. It’s the result of preparation, hard work, and learning from failure.” And while it’s not likely that he was thinking about vegetable growing at the time, it’s a premise that certainly holds true in the garden! Planning your veg plot in advance will help you to make the most use of your space and harvest healthy veg over a longer season. Check out Suttons Gardening Club to see how to save money on seeds and plants for the next year.

WHEN SHOULD YOU PLANT FRITILLARIA IMPERIALIS BULBS?

When should you plant Fritillaria imperialis bulbs?

WANT TO BUY RARE AND UNUSUAL SEEDS? THEN CLICK HERE FOR THE 'SEEDS OF EADEN' SEED SHOP

The Fritillaria imperialis, common known as the crown imperial, imperial fritillary and even Kaiser's crown is an absolutely gorgeous collection of cultivars whose original species is native to a wide stretch of  territory from the Anatolian plateau of Turkey, Iraq and Iran to Afghanistan, Pakistan, Northern India and the Himalayan foothills. Flowering in early spring in the northern hemisphere, Fritillaria imperialis is notable for its brightly coloured, pendulous flowers topped by a 'crown' of small leaves. The common names and also the species name 'imperialis' literally means 'of the emperor', which refers to the large circle of golden flowers of the native species, reminiscent of an emperor's crown. There are a number of wonderful species available including the striking variegated from of Fritillaria imperialis 'argenteovariegata'. In fact both the species and the yellow-flowered 'Maxima Lutea' have received the Royal Horticultural Society's Award of Garden Merit. 

When should you plant Fritillaria imperialis bulbs?
So back to the question at hand, when should you plant  Fritillaria imperialis bulbs? Well, Fritillaria imperialis bulbs are considerably more expensive that the usual run-of -the-mill cultivars. In fact Fritillaria imperialis 'argenteovariegata can retail upwards of £12.00 for a single bulb! So when it comes to planting timing and technique you want to get it right otherwise your investment an come to a sticky end due to the risk of fungal rots. 

For best results grow Fritillaria imperialis 12 inches apart in well-drained soil, ideally on a bed of gravel or perlite, in full sun. Plant them five inches (12 cm.) deep, but take care to plant them on their sides as this reduces the risk of rots attacking the crown of the bulb. prior to plant it can be worth mixing a small handful of bonemeal to the soil below where the bulb will be sited.

As with other fritillaria bulbs, crown imperial fritillaria should be planted from late summer to autumn so September to October will be best.

For related articles click onto the following links:

Dracunculus vulgaris - The Dragonlily
HOW TO GROW THE CROWN IMPERIAL LILY
HOW TO GROW THE FOXTAIL LILY
HOW TO GROW FRITILLARIA IMPERIALIS FROM SEED
HOW TO GROW THE SNAKE'S HEAD FRITILLARY - Fritillaria meleagris
HOW TO PLANT LILY BULBS
How to Grow Native Wild Primroses and Polyanthus from Seed

HOW TO PLANT FRITILLARY BULBS
How to Propagate and Grow Mistletoe
How to Propagate Box Hedging
How to Propagate the Snake's Head Fritillary
LILIUM NEPALENSE - The Lily of Nepal
Native Pond Plants
Old English Plants - Polyanthus 'Gold Lace'
RHS Snake Head Fritillary
THE GLORY LILY - Gloriosa rothschildiana


HOW TO GROW LABURNUM ALPINUM

How to grow Laburnum alpinum


Commonly known as the 'Scotch Laburnum', Laburnum alpinum is a small, broad-headed tree grown primarily for its long, drooping racemes of fragrant blooms. As with so many garden plants the common name is misleading as Laburnum alpinum is not indigenous to Scotland. It is in fact a native to Central and Southern Europe, although it is a species which has naturalized in Scotland. The 'Golden Rain' or 'Golden Chain' tree are also used as common names and arguably far more appropriate.

 Laburnum alpinum
Laburnum alpinum has been under cultivation in Britain since around 1560 and was originally named Cytisus alpinum by Scottish botanist and former Curator of Chelsea Physic Garden, Phillip Miller (1691 – 1771). In 1830, it was reclassified and listed in the Laburnum genus by Bohemian natural scientist Jan Svatopluk Presl (1791–1849).

Depending on conditions you can expect Laburnum alpinum to achieve a height of between 5-7 metres, with a width of 3-5 metres. The leaves are trifoliate, a deep, shining mid-green on the surface, yet paler and slightly hairy underneath.

The panicles of vanilla scented, pea-like, bright-yellow flowers are borne from late May to early June and can be up to 30 cm long. Once pollinated, flattened, glabrous and glossy seed pods seedpods appear.

Laburnum alpinum will perform best in a well-drained, loamy soil but it will also tolerates heavy clay and nutritionally poor soils if needed. It will grow in either semi-shaded position or full sun, however it will always produce a better flowering display in full sun. It can withstand surprisingly strong winds once established although staking will be required for young specimens in exposed position. That being said has a history of performing poorly in coastal regions.

Warning. All parts of the plant, and especially the seed, are poisonous!

Click here for related articles:
ARE CHERRY LAUREL FRUIT POISONOUS?

HOW TO GROW LABURNUM WATERERI 'ALFORDS WEEPING'


How to grow Laburnum 'Alfords Weeping'


If your are looking for something other than the usual offering of Laburnum species and hybrids (notably Laburnum alpinum, and Laburnum × watereri 'Vossii), then consider the following form - Laburnum x watereri 'Alfold Weeping'.

Like Laburnum x watereri 'Vossii, Laburnum x watereri 'Alfold Weeping' is a selected seedling of the naturally occurring hybrids of  Laburnum alpinum and Laburnum anagyroides. However all hybrids from these parents are named after the type raised at Waterers nurseries in Knaphill, England - hence the 'watereri' part of the hybrid name.

Laburnum 'Alfords Weeping'
Laburnum x watereri 'Alfolds Weeping' is a small, vigorous, tree with an upright habit, a wide spreading head and long, drooping branches. Growing up to 4 metres tall, it is a deciduous tree with vivid green leaves consisting of 3 elliptic to elliptic-oblong leaflets up to 3 inches long. It produces fragrant yellow 2 cm long flowers on 15 to 25 cm long pendant racemes in June, however the foliage tends to partially obscure the flowers

It was a selected seedling from Hilliers nurseries, Hampshire, England, discovered by and named after Alfred Alford in 1965, the nursery foreman.

Plant container grown plants at anytime of year, so long as you have favourable weather. Bare-root specimen will need to be planted between October and March. Be aware that young plants will always need the support of a sturdy stake for the first few years after plating until its root system establishes and its truck thickens. It will perform best in any ordinary, moist, well-drained and slightly acidic soils, and will tolerate heavy clay, and even chalky. However avoid areas prone to waterlogging.

Laburnum x watereri 'Alfolds Weeping' will tolerate a partially shaded position but flowering will always be more impressive when in full sun. Be aware that young plants will always need the support of a sturdy stake for the first few years after plating until its root system establishes and its truck thickens.

WARNING. All parts of Laburnum x watereri 'Alfolds Weeping' are poisonous if ingested, in particular the seeds.

Click here for related articles:
ARE CHERRY LAUREL FRUIT POISONOUS?