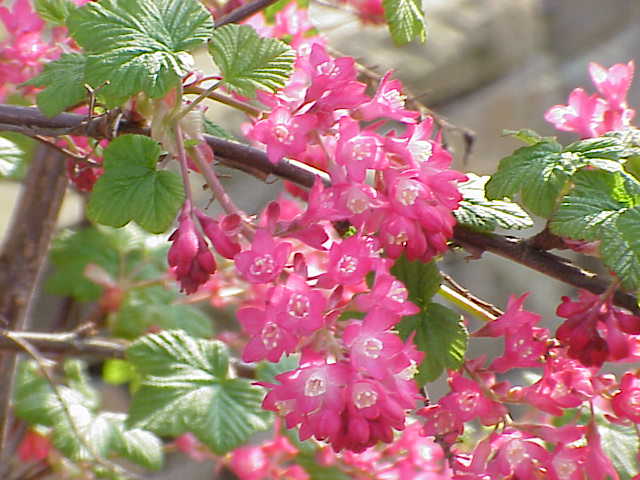
HOW DO YOU CARE FOR RIBES SANGUINEUM?

How do you care for Ribes sanguineum?

During the late 17th century when I was a pre-horticultural, yet eager, teenager working in a south London garden centre, I had clear memories of block displays of flowering Forsytha x  intermedia cultivars and Ribes sanguineum. Both were early flowering and both would flower strongly on the new wood. By pruning them back to the crown the previous year you ensured nursery stock with top to bottom blooms. Both very eye-catching, both very impressive and both very popular with the customers. However we are not talking about Forsythia we are focusing on Ribes, so how do you care for Ribes sanguineum?

Native to the dry open woods and rocky slopes of western United States and Canada, Ribes sanguineum is a deciduous shrub introduced into cultivation by 19th century Scottish botanist David Douglas. In the UK it has proven to be a hardy and trouble-free with Ribes sanguineum 'King Edward VII' being the most widely cultivated and therefore the most available selected variety. When left uncultivated Ribes horticultural references indicate that mature specimens can reach a height of approximately 1.5-2 metres however the abandoned specimen in my garden currently stands at 2.5-3 metres! 

Once purchased, Ribes sanguineum will perform best in full sun in all moderately fertile, well-drained soils. If you experience periods of drought during their first season then they will require periodic watering. However once established they are relatively maintenance free except for the cut back down to the crown immediately after flowering. After this heavy prune apply a generous layer of mulch, such as sterilized, well-rotted farm manure or garden compost around the base of the plant. Avoid having the compost touching the trunk.

NOTE!  - Please be aware that Ribes should never be planted near pine trees as they can be a host to white pine blister rust. Ribes are also very susceptible to honey fungus. Aphids, leaf spot and powdery mildew may also be a problem. Apart from all of that they are fine.


HOW TO BUILD A PROGRAMMABLE, DAY AND NIGHT, THERMOSTATICALLY CONTROLLED, PROPAGATOR FOR GERMINATING BANANA SEEDS


If you are looking for a touch of the tropics in your cold, northern European garden then their is very little that can compete with having banana plants growing in your traditional borders. Of course you can purchase banana plants from you local garden center, but let's be honest neither availability or range are particularly strong in the UK. That being said they is a usually a good range of banana seeds available on the internet, mostly eBay although other sites are available. The trick is with the propagation of banana seeds itself, which once dealt with is as easy as any other plants that requires a heated propagator. If you didn't know before, banana seeds require different germinating temperatures at night and during the day, therefore you will need a programmable thermostatically controlled propagator for germinating banana seeds.

Of course you can go out and purchase a heated propagator from almost anywhere, and this will work although you may need to manually set the temperature each morning and each night for up to three months or so. This is obviously a bit of a faff. Typically banana seeds will need a night temperature of approximately 15 degrees Celsius and a daytime of between 25-35 degrees Celsius depending on the species. Therefore a programmable, thermostat which can run separate time periods at separate temperatures is a must. A simple home thermostat for your central heating is ideal! However, and ths is the clever bit, if the environment where you propagator is housed has an ambient temperature of around 15 degrees Celsius then all you need is a simple thermostat and a timer. Run the heater at your required temperature then turn it off so that it falls to the ambient temperature overnight. For northern Europe this effectively means that you a have two opportunities in the year where there is a three month period when overnight temperatures hover around 15 degrees Celsius - late spring and late autumn.

As you can see in the video the perhaps the biggest issue is maintaining the high day temperatures required which is why a purpose built propagator has been fabricated from polystyrene due to its fantastic insulation properties. Now depending on the size of the heat mats purchased, you may be able to obtain prefabricated polystyrene boxes from you local aquatic store. 

As with pretty much all seeds, light is required for germination so a glass top to you propagator is essential, one which is double glazed is preferred albeit pricey. If you need to supplement lighting remember that you will need a light with spectrum as near to day light as possible. These can be purchased on light or at your local pet shop.

For related articles click onto the following links:
BANANA PLANTS


CAN YOU LEAVE TULIPS IN THE GROUND ALL YEAR?

Can you leave tulips in the ground all year?

Tulips are arguably the brightest and purest coloured plants for early spring flowering. And if you don't have a passion for the fruits of the genus Tulipa then you clearly have a heart made from frozen spiders. But of course you love tulips as much as I do otherwise you wouldn't be reading this article. So once your tulips have exhausted their abundant charms and have withered back into the abyss there is a question to be asked. Can you leave tulips in the ground all year?

This is a great question. If you had grandparents like me you would be familiar with the yearly ritual of lifting after die-back and drying bulbs over the summer, a routine that had been handed down through the generations since before the Victorian golden age of gardening. On the other hand, my own parents did no such thing and everything was left in the ground with their usual two chances of survival. They either did or they didn't.

So back to whether you can leave tulips in the ground all year. The most important aspects to this question are site and soil. Your tulips will need to be planted somewhere where they will receive as much sunlight as possible. Regarding soil conditions, tulips will perform best in a nutrient rich, free-draining soil which does not become waterlogged during freezing conditions. If you can provide these conditions then you should be able to leave you tulips in the ground all year round. However to help your plants along consider applying a liquid soluble fertilizer periodically between the end of flowering and when the old stems have turned brown.

Just a few more points, the further north in the country you are intending to grow your tulips the ore likely you are going to need to provide a dry mulch to protect the bulbs from freezing conditions. Also the traditional tulip varieties that have proven themselves capable of remaining planted outside are likely to fair far better than the more modern fancier varieties. So the true answer to this question, as it is in life, is to do your research first.

For further reading click onto the following links:

WHAT TO DO WITH TULIPS AFTER THEY DIE?

What do you do with tulips after they die?

Tulips are arguably the most bright and colourful of all spring flowering ornamental plants and (assuming they are not ravaged by slugs as they emerge from the soil) provide a gorgeous display, not only of hope for warmer weather, but of perfect lush foliage. This is also enhanced by the anticipation of the opening of their glorious buds. As with many of the best things in life the beauty of the tulip is short lived, so it isn't long before the petals fall and the foliage discolours. So the question is this, what to do with tulips after they die?

Of course once they have finished flowering and the foliage and stems fade they are not truly dead, they are just moving into the next phase of their seasonal existence. If the blooms have pollinated then the tulip will divert its energy into producing hopefully viable seeds. If not the plant is absorbing carbohydrates, nutrients and sugars back into the bulb to repurpose the following spring. Of course, it maybe that you tulip is actually dead and if that is the case , just throw it into a incinerator along with the surrounding soil to reduce the spread of any possible pest of pathogen.

As far as good horticultural practice goes, you don't need to do anything to the tulip after they die as they are quite capable of looking after themselves, assuming they have been positioned and planted in favourable conditions. Of course, any brown shriveled foliage or stems can be removed one the bulb has finished sucking the life out of them. However if you are gardening in an area of the country prone to freezing wet weather, or are cultivating weaker, virus colour-broken cultivars or even species unsuitable for overwintering in northern european climates then you need to get your hands dirty by lifting and storing.

Lifting and storing tulips

If you need to lift and store tulip bulbs then it's all about technique and timing. Once flowering has finished, dead-head you plants to prevent them from producing seeds as this is an energy sapping process for your bulb. The same energy which you will need for the following seasons display. 

Once the foliage had turned yellow/brown your bulbs will be ready for lifting, choose a day when the soil is lovely and dry to aid lifting. Working with wet bulbs is no fun. Clean off the soil and discard and bulbs which are damaged or diseased. Place they bulbs in trays so that they are not touching and move to a warm (un-heated), dry, well-ventilated environment so that they can continue to dry off naturally. A  temperature of between 18-20°C will be perfect.

Come the autumn your bulbs can be planted back into position once again, however if a flowering display is paramount, use these stored bulbs in less significan borders and new bulbs in prominent areas.

For related article click onto the following links:

DO BLACK TULIPS REALLY EXIST?
How to Grow Species Tulips from Seed
HOW TO OVERWINTER RARE AND SPECIES TULIPS
HOW TO PROPAGATE TULIPS
LOST TULIPS OF THE DUTCH GOLDEN AGE - SEMPER AUGUSTUS AND THE VICEROY
OLD DUTCH TULIPS - Tulip 'Absalom'
OLD DUTCH TULIPS - Tulip 'Lac van Rijn'
SPECIES TULIP - Tulipa Wilsoniana
THE WORLD'S MOST EXPENSIVE TULIP - EVER!
Top Tips for Tulip Care
TULIPA ACUMINATA
TULIP HISTORY AND POPULAR VARIETIES
Tulip History
TULIP ‘SEMPER AUGUSTUS’ - DOES IT STILL EXIST?
WHAT IS THE TULIP BREAKING VIRUS?


DO DAFFODILS GROW BACK EVERY YEAR?

Do daffodils grow back every year?

While not the first bulb to come into flower in the spring, daffodils are certainly the most prominent. Planted in huge numbers every year, England can often appear awash with their perfect golden blooms. When priced per bulb, the more common varieties are among the cheapest ornamental flowering bulbs you can buy, but when purchasing the more fancier cultivars in bulb for mass planting schemes it can become expensive. So with such an investment it would be great to have an answer to the question that is on many a novice gardeners lips. Do daffodils grow back every year?

Native to meadows and woods in southern Europe and North Africa, daffodils have evolved to survive in the warm, dry climates of the Mediterranean basin. That being said, they have naturalized widely and in doing so have become an important commercial crop centered primarily in the Netherlands. The Netherlands being a relatively cold and wet northern European country. Now not all plants native to the Mediterranean basin are able to cope with the freezing wet winters of England and so it is reasonable to assume that daffodils would not be hardy enough to survive our northern European climate. However, as with many bulb genera, daffodils have proven themselves to be considerably robust and over time both wild and cultivated plants have become naturalized widely. In fact, the daffodil is the national flower of Wales in the United Kingdom.

Of course, not all daffodil species and cultivars are going to be hardy enough to survive year on year under the environmental stress of the British climate, but the upside is that so many do. So, as long as you choose tried and tested varieties you will find that daffodils will grow back every year. To choose form the best you only need to go to the RHS website to research which varieties and cultivars have been awarded the RHS Award of Merit.  

For related articles click onto the following links:

CAN DAFFODILS KILL YOU?

Can daffodils kill you

Can daffodils kill you! This is a great question and one which summons images of roaming Narcissi with the capability of murderous intent. Of course daffodils are not Triffids, which are themselves a only a figment of author John Wyndham's mind, and neither are they sentient in the way that humans imagine. However the question remains and as some say, there is no smoke without fire. 

Now most gardeners will probably tell you that Daffodils can't kill you, and then question why would you ask such a strange question of one of our most popular and ubiquitous flowering bulbs. However as it turns out, Narcissi produce approximately 80 alkaloids (in particular the notorious alkaloid poison lycorine), some of which are there to protect the plant, but can also be poisonous if accidentally eaten. This has occured when certain species are mistaken for leeks or onions and cooked and eaten. Unintentional poisoning is generally rare due to the strong unpleasant taste realised.

Toxicity among daffodil species does vary, as does the concentration of these toxins within the bulb and the foliage. Ingestion of  Daffodil species N. pseudonarcissus or N. jonquilla is followed by one or more of the following side effects,  salivation, acute abdominal pains, nausea, vomiting, and diarrhea. Unfortunately it doesn't end there as this is followed by neurological and cardiac events, including trembling, convulsions, and paralysis. Death can result if large quantities are consumed and there is documented history of Daffodils being ingested in order to commit suicide. So it is true, Daffodils can kill you.

So imagine that you or someone around had eaten a daffodil, what do you do? Go straight to you nearest Hospital A and E. It is likely that activated carbon, salts and laxatives will be administered, and for severe symptoms intravenous atropine and emetics or stomach pumping may be required.

For related articles click onto the following links:

DO HYACINTHS PREFER SUN OR SHADE?

Do Hyacinths prefer sun or shade?

Despite being under commercial cultivation since the 1500's, Hyacinths have remained a firm favourite with both gardeners and plant breeders alike. Today's cultivars are a fantastic collection of stocky, densely flowered specimens with some extraordinarily rich colouration. They are generally sold as forced bulbs in late autumn for flowering during the Christmas period. This is so that the heavy, luxurious fragrance can be enjoyed over the holiday.  Once flowering is over it is in the interest of the Hyacinth growers it is in the interest of the growers for you to throw them away and purchase new bulbs the following season but this is not necessary as they can be planted outside once weather conditions allow. This then begs the question of do Hyacinths prefer sun or shade?

To find the answer to this you only have to look at the environmental conditions that Hyacinths have evolved to survive.This is an area that stretches across the eastern Mediterranean from the north of Bulgaria through to the northern part of the region of Palestine. This region experiences low rainfall, subtropical temperatures and high levels of sunlight. Therefore is planting outside in the garden it is imperative that Hyacinth bulbs are planted where they can receive as much sun as possible.

That being said, when grown indoors as forced bulbs is is generally recommend to place in a room which is bright but does not receive direct sunlight as thi scan can cause the blooms to fade somewhat depending on the cultivar. So there you have it, do Hyacinths prefer sun or shade? Well on the whole yes, unless you are growing them indoors then its kind of yes.

For related articles click onto the following links:
BBC Hyacinths

WHAT DO YOU DO WITH HYACINTH BULBS AFTER THEY BLOOM?

What do you do with Hyacinths after they bloom?

The producers of Hyacinths, notably the Dutch horticultural industry, want to sell you hyacinth bulbs every year. That way they can sell as many as the can, and maximize their profits every year. But here's the thing, Hyacinth bulbs are not annuals, the every fact of them being a bulb means that the have evolved to survive harsh conditions, ready to regrow and bloom the following season. This gives you two choices. Either pander to big business and throw your perfectly good Hyacinths away and contribute to our wasteful society, or try and care for them in such a way that they will have a chance to boom again in the coming spring. The question is this, what do you do with Hyacinth bulbs after they bloom?

For this answer I am going to presume that you have purchased hyacinth bulbs for indoor use so you can enjoy both the gorgeous scent and stunning full blooms. If you are thinking about bulbs already naturalized outside in the garden then you have two single choices. Either remove the flowering stalk to the base keep your borders tidy (either cut the stalk, or if it has died back enough it will just pull out by hand), or allow the flowering stalk to die back naturally so that the bulb can recuperate sugars and carbohydrates back into the bulb for re-use next spring - perfect recycling!

Back to indoor specimens, I accept that Hyacinths are not native to the freezing, wet condition of northern Europe. However given the right conditions they will indeed flower year on year with little maintenance. Firstly the aspect is important as Hyacinths have the capacity to produce enormous amounts of blooms and they will require two things to do this otherwise subsequent blooms will be considerably weaker. They need full sun, as much as they can possible receive and a well draining, warm soil. Absolutely avoid ground which becomes waterlogged, especially over the winter. Once flowering is over and the foliage is still lush, don't be afraid to provide a liquid fertilizer every week or so to help build up the bulb for next years display. In cooler northern regions of the country provide a couple of inches of a dry mulch (such as bark chips of gravel) to prevent the overwintering bulbs from being frost damaged. 

Alternatively, if you want to grown them on as container specimens you can do that too. Conditions remain the same as in full sun and well-drained compost. Choose something like a John Innes 'No 1' and add a handful of horticultural grit to it. In the winter you can easily move your container to a frost-free protected environment.

So that is what you do with Hyacinths after they bloom.

For related articles click onto the following links:
BBC Hyacinths


WHEN SHOULD I PRUNE MY HAMAMELIS?

When should I prune my Hamamelis?

Hamamelis species and cultivars are an absolutely glorious addition to the garden. There is literally nothing else which produces such a bold and yet bizarre display of late winter blooms. Unfortunately throughout the rest of the growing season I have to be honest and say, that when it comes to all-round-interest, boring is an understatement. But you know you can always hide them at the back of a border and use them as a backdrop for something more ornamental. So going back to their fantastic flowers, you are going to want your specimen to produce its best show and pruning will be an essential element to this. The question is therefore this, when should I prune my Hamamelis? Get this wrong and you could lose your seasonal display.

Native to North America, Japan and China the genus Hamamelis is composed or relatively slow growing deciduous shrubs, though arguably small trees which depending on the species can reach an overall height of between 10 and 40 feet tall. Selected cultivars will be considerably smaller. In general, Hamamelis will not require regular pruning so feel free to let them grow as the will. However it is always advisable to remove any dead, damaged, congested, crossing or weak shoots.

If you have planted one of the larger species and need to restrict the size of your specimen then cut back the previous season’s growth to two leaf buds from the main stem. This should be carried out immediately after flowering. Hamamelis flowers on the previous season new growth and usually before leaf-but break. If this cut is done later on in the year you will be removing the flowering wood. Be aware that leaf buds are longer and narrower than the more rounded flower buds, so always take care not to remove the flower buds in the process

If you have inherited a particularly large plant that has outgrown its allotted space don't worry. You can remedy this by remove some of the older, larger branches by cutting them back to a healthy new shoot. It’s best to stage this pruning over two or three years. Even over this is done in stages over a few years this will still stress your Hamamelis causing it to recover slowly. Furthermore these kind of hard cuts on grafted cultivars can encourage the rootstock to produce lots of suckers - long vigorous stems sprouting from the base o the stem

These suckers can be recognised as they usually hold on to their leaves longer in autumn. Try to spot these when they are as small as possible and tear them away from the rootstock. If you chose to cut them this can encourage even more suckering.

For related articles click onto the following link:
HOW TO GROW HAMAMELIS MOLLIS
How to Grow Witch-hazel - Hamamelis
HOW TO GROW WITCH HAZEL FROM SEED - Hamamelis species
The Witch-Hazel - Hamamelis species


ARE AZALEAS EASY TO GROW?

Are Azaleas easy to grow?

It's hard not to be tempted when faced with a garden centre full of flowering Azaleas. Of course it would lovely to have one or more in your own garden, and why wouldn't you want them? Evergreen, hardy and resistant to most plant nasties found in the UK, surely they are a perfect package? The trouble is this, they look a little exotic, and maybe that means they are a bit too-good-to-be-true? So the question is this, are Azaleas easy to grow?

Well the good news is that on the whole they are, assuming they have been given favorable growing conditions. Luckily there are just three things you need to know - root environment, watering and sunlight.

Sunlight

This is quite simple, position small leaved, alpine-like Azaleas in full sun. Place the large leaved varieties in partial shade away from first-thing-in-the-morning sun and full-strength midday sun.

Watering

Azaleas like a moist but well drained loam or sandy soil. Avoid areas which become waterlogged, especially during cold winters, and those which dry out over the summer. If you do experience extended periods of drought, make sure you water your Azaleas. At the base that is, I don't want to see water sprayed over blooms and foliage during hot weather.

Root environment

This is arguably the most important aspect to growing Azaleas successfully. Azaleas are within the ericaceae family and as such are known for tolerating acidic soils. They are so good in fact at tolerating acidic soils that they struggle to maintain any semblance of condition in alkaline soils. In fact they can easily become chlorotic and stunted in a pH over 6.5. With this in mind you will need to plant into acidic soil conditions, preferably within the 5.5-6.5 range. Don't worry if your garden soil is alkaline that there are remedies which can be actioned to rectify this. The easiest is to grow your Azalea in a contain filled with ericaceous compost. Avoid concrete containers as the lime within will leach out and increase the alkalinity around the root environment. When growing in the ground, again you can dig a large hole and fill with ericaceous compost.

Alternatively you can acidify the soil by digging in naturally acidic moss peat or by applying flowers of sulphur.

Main image credit - Famartin - Own work, CC BY-SA 3.0, https://commons.wikimedia.org/w/index.php?curid=33017446

For related articles click onto the following links:
CAMELLIA JAPONICA 'BLACK LACE'
CAMELLIA JAPONICA 'Desire'
CAMELLIA JAPONICA 'Mrs. Tingley'
CAMELLIA 'ROYALTY'

WHERE DO AZALEAS GROW BEST?

Where do azaleas grow best?

Although promoted in many texts and garden centres as their own genus, Azaleas are in fact are Rhododendrons. That being said they are generally listed as the subspecies Azaleastrum. Of course while there are clear similarities, there are indeed differences such as stamen numbers, bud prominence and foliage size and structure. However when it comes to the growing conditions required within the garden environment they are very much the same. So where do azaleas grow best?

Being held within the genus Rhododendron, Azaleas are amember for the Ericaceae family which is known for its tolerance of acidic soils. Azaleas are no different and so when planting azalea in the garden you will need to provide a soil pH preferably between roughly 4.5–5.5, although they will tolerate between 5.0 and 6.0. If soil soil is not naturally acidic don't worry there are things that you can do to ameliorate this. The easiest is to dig a large hole and back fill it with ericaceous compost before planting your azalea. Alternatively you can dig naturally acidic moss peat into the soil or chemically alter it by apply flowers of sulphur. If you are intending to grow azaleas in pot the the solution is simple. When choosing which compost to use, you will need ericaceous, preferably one mixed with John innes compost. Just one more thing here with regards to container choice, avoid concrete pots as the lime within them will increase the alkalinity of your compost over time.

Assuming your soil is fine regarding acidity then choose a regularly moist position and dig in plenty of organic matter such as leaf mold and sterilized, blended, well-rotted farm manure. One thing you need to be aware of with, and not just for Azaleas but also Rhododendrons and Camellias, is to place them away from morning and full midday position so that their early flowers do not get frosted by a sudden thaw caused by sun.

Regarding light, Azaleas will perform best in partial shade and out of direct sun during the hottest part of the day. That being said, in the north of England they will be fine in full sun.

For related articles click onto the following links:
ARE AZALEAS EASY TO GROW?

CAMELLIA JAPONICA 'BLACK LACE'
CAMELLIA JAPONICA 'Desire'
CAMELLIA JAPONICA 'Mrs. Tingley'
CAMELLIA 'ROYALTY'

WHEN SHOULD YOU PRUNE RHODODENDRONS?

When should you prune Rhododendron?

If you are looking for a fantastic spring flower display then Rhododendron have to be in your choice of top five shrubs.  Not only are they smothered in brightly coloured blooms, they are evergreen, and tough as old boots. Over time, many of the traditional cultivars can become quite large specimens and arguably not really suitable for the small suburban garden. So if you are facing a Rhododendron specimen that has grown beyond its appropriate space you are going to have to consider giving it a cut. The question you should then be asking then is when should you prune Rhododendron?

Typically, Rhododendrons won't need much in the way of pruning. Their normal requirements is just to removal unhealthy, dead, diseased or damaged shoots. This is performed mid-spring, just before the new growth emerges. Avoid trimming immediately after the spring flush of new growth as this can lose you the following springs display of flowers.

If flowering is paramount to you, and you are only looking at performing a light trim then the answer is simple. Prune immediately after flowering. That way you will minimise the impact on next years show. If you are looking at a severe cut then you are in luck as Rhododendrons are known to responding well to a hard cutting back. Such heavy cuts are advised to be performed when the plant is dormant in late winter.

For related articles click onto the following links:
HOW TO GROW RHODODENDRON IMPEDITUM
HOW TO GROW RHODODENDRON SINOGRANDE
HOW TO GROW RHODODENDRONS IN ALKALINE SOIL
RHODODENDRON SINOGRANDE