FESTUCA GLAUCA - The Blue Fescue

Image credit - http://imgbuddy.com/

The blue fescue - Festuca glauca is a hardy clump-forming, ornamental grass noted for its eye-catching, finely-textured, blue-gray foliage. Depending on how cold winter temperatures become in its local it is an evergreen or semi-evergreen herbaceous perennial which once established can reach a height of approximately 14–18 cm. The cultivated form 'Elijah Blue' has one of the most intense silvery-blue coloured foliage of all dwarf grass species.

Image credit - http://imgbuddy.com/
Originally described by French naturalist Dominique Villars in 1787, Festuca glauca forms a dome-shaped, tuft of erect to arching, needle-like 9-ribbed grass blades. Each blades radiates upwards and outwards and usually found to be between 14-18 cm in length.

Flower stems appear above the foliage late spring to early summer. Light green flowers with a purple tinge appear in terminal panicles at the top of stems. Once pollinated wheat-like seed heads will appear.

Festuca glauca will be best planted between September and April in a sunny position. Light, well-drained soils are prefered. Remove flower heads as they appear to maintain foliage growth.

Mature plants have a habit of dying out in the centre and so to maintain a compact habit you will need to divide and replant established clumps during the winter.

Festuca glauca can be prone to fungal infection commonly known as rust. This is recognised from brown, orange or yellowish pustules that appear  on shoots and on the leaves lower surfaces. Remove affected blades as soon as they are noticed and apply a systemic fungicide. If at all possible improve ventilation and reduce humidity around the infected specimen.

For related article click onto the following links:

WHY ARE MY LEMON LEAVES CURLING?

Why are my lemon leaves curling - http://plant.daleysfruit.com.au/

Lemon trees are often the prize plant of any collection so the slightest mark or errant leaf is always course for concern.

Unfortunately curling leaves on a lemon plant is never a good sign and is usually caused either by environmental conditions or pest damage.

1. Under watering

Under watering/over watering - http://0.tqn.com/w/experts/
Perhaps the most common reason as to what causes lemon leaves to curl is down to prolonged, dry conditions. Plants lose water through specialist holes on the surface of the leaves known as stomata. In most plant species there is a higher density of stomatal pores on the underside of the leaf. When the plant senses water stress the leaves will tend to curl downwards, away from the central rib. Curling reduces exposure to drying winds and increases relative humidity around the stomatal pores significantly reducing water loss through the leaves. Of course if dry conditions continue the plant may take the extreme measure of dropping its leaves to cut water loss to an absolute minimum.

Treatment

Water your plant!

2. Overwatering

It may sound strange but the symptoms for over watering are exactly the same for under watering. Why? Too much water can easily damage the root system. The fine root hairs of a plant which absorb moisture from the soil require the presence of air to metabolise. If the root hairs are submerged for extended periods then they will die and therefore be unable to function. If the roots cannot function then they cannot draw water into the plant so the plants naturally begins to dry out. Dry, curling leaves from under watering, dry curling leaves from overwatering - same thing!

Leaf folding caterpillar - http://0.tqn.com/w/experts/
Treatment

Allow the roots to dry out before watering. In extreme conditions lift garden plants to help them dry out.

Container grown plants will need to be removed from the pots and placed on old newspapers to help draw out the excess water.

Cut stems back by 1/3rd and allow the plant to rest for a couple of weeks in a cool dry position before watering again.

Allow the plant to dry out between watering and never let the roots become waterlogged for extended periods.

3. Caterpillars

The majority of caterpillars will be quite happy feeding openly on leaves, buds and shoots, however some caterpillar species produce a silk webbing which they use to draw the leaves together into a protective tent-like covering. In this instance the leaves are usually curled towards the central spine.

Treatment

Either remove the caterpillars by hand or apply a suitable insecticide.

4. Biting insects

Biting insect damage - http://0.tqn.com/w/experts/
While mature lemon leaves are tough, waxy and generally consumed only by the most determined of caterpillars, the new growth is soft and appetizing to a range of biting insects such as aphids, mites and psyllids.

Aphids prefer to bite into parenchyma cells and consume the sugary sap, while psyllids and mites consumes the foliage.

As pest populations increase the structure of the new leaf becomes contorted, often curled, as it grows as a direct result of the damage caused. Whichever pest is consuming attacking the new growth there are often associated discolourations, and in the instance of aphid damage sooty mold may be present.

Treatment

Spray affected plants with a suitable insecticide

5. Seasonal effect

Sometimes lemon leaves will naturally curl downwards as a reaction to the colder night temperatures of autumn and early winter weather. This is nothing to worry about (unless it gets too cold) as the new growth in the spring will emerge perfectly. Unless it has been subjected to insect damage!

For related articles click onto the following links:

THE BUTTERFLY ORCHID - Psychopsis papilio

"Psychopsis papilio" by Brocken Inaglory - Own work. Licensed under CC BY-SA 3.0 via Wikimedia Commons - http://commons.wikimedia.org/wiki/File:Psychopsis_papilio.jpg#/media/File:Psychopsis_papilio.jpg


The butterfly orchid - Psychopsis papilio, is just one of eight species within the Psychopsis genus, although there can be a certain amount of confusion as a number of other orchid species outside of the Psychopsis genus which also go by the same common name.

Butterfly orchid - https://orchid.unibas.ch/
Native to central America, notably Panama, Trinidad, Colombia, Venezuela, Suriname, French Guiana and Brazil, its defining feature is its long lasting flower which from a distance resemble large, brightly colored butterflies. Like many other species of orchid, the butterfly orchid is an epiphyte (a plant which grows harmlessly upon another plant deriving its moisture and nutrients from the air, rain, and accumulated debris). What looks like a head is in fact a modified petal, as are the very long antennae-like structures. The outspread, dappled yellow and brown, wings are not true petals as one would think but sepals (modified leaves).

The striking blooms are approximately 13-15 cm long and emerge near the top of a the flowering stem, more correctly known as an inflorescence. Each stem will usually be between 60-150 cm long depending on how long it has been producing flowers. Only one flower will be in bloom at any one time on the same stem. but mature plants can produce more than one inflorescence. The inflorescence will continues to grow, forming new buds often over a period of several years.

The erect, dull green leaves are approximately 15-25 cm long and each leaf is produced at the top of a single brown, mottled with red blotches, pseudobulb. Each pseudo-bulb will vary between 3-5 cm height.

Its habitat is found in the lower montane forests where they prefer the shady, humid and wet conditions. Rainfall is moderate to heavy from late spring through early autumn. Plants can tolerate higher light levels without scorching but only when accompanied by high humidity and good ventilation. Cultivated plants should be watered often while actively growing, but will need the substrate to dry out between waterings. For example, the butterfly orchid should be watered every 2-3 days during the warmest period of the summer, however they may need several waterings a day in hot, dry weather. Be aware that cultivated specimens have a habit of succumbing to fungal infections if kept too wet over the winter.

Feed with a water soluble orchid fertiliser weekly during periods of active growth but at a reduced rate of perhaps 1/4-1/2 of the normal recommended strength,

For related articles click onto the following links:
CHARLES DARWIN'S FAVOURITE ORCHID - Catasetum species
HOW TO GROW THE HYACINTH ORCHID - Bletilla striata
HOW TO GROW MONKEY FACE ORCHIDS FROM SEED
MONKEY FACE ORCHIDS
NAKED MAN ORCHID - Orchis Italica
Psychopsis papilio
SCHOMBURGKIA EXALTATA
THE ANGEL ORCHID
THE ANGEL ORCHID - Habenaria Grandifloriformis
THE BEE ORCHIDS
CHRISTMAS STAR ORCHID - Angraecum sesquipedale
THE FLYING DUCK ORCHID
THE MOTH ORCHID -  Phalaenopsis species and cultivars
THE ORCHID CACTUS - Disocactus ackermannii
THE ORCHID MANTIS
THE SWADDLED BABIES ORCHID - Anguloa Uniflora
THE SWALLOWTAIL BUTTERFLY
THE VAMPIRE ORCHID - Catasetum macrocarpum
THE WHITE EGRET FLOWER - Pecteilis radiata
THE WORLD'S LARGEST BUTTERFLY - Ornithoptera alexandrae
WHAT IS AN ORCHID?

HELLEBORUS 'Penny's Pink'

Helleborus 'Penny's Pink'

If you are looking for a bold display of long-lasting, spring flowering plants then you will be hard pressed to beat the very best that the hellebore breeders have to offer.

Arguably one of the most impressive is Helleborus 'Penny's Pink', a stunning hybrid developed by Rodney Davy and Lynda Windsor at R D Plants in Devon.

Helleborus 'Penny's Pink'
Not only is it noted for an abundance of blooms which occur from late February onwards it also has extremely ornamental, as well as architectural, marbled foliage.

It is a hardy, clump forming perennial that can reach a height of approximately 24 inches and a spread of around 30 inches. The evergreen leaves are 5 or 6 lobed and leathery in texture and up to 12 inches wide. Interestingly they are blue-green flushed pink when they newly emerge, turning to a mid-green, less marbled colouration once they mature.

The 3 inch wide, single, cup-shaped blooms emerge bright, mauve-pink on stems a good 3-4 inches above the foliage, however the colour will change to a deeper pink as they will mature. The flowers are extremely long lasting, albeit sterile, and can remain on the stems for up to three months turning darker as time goes on.

Helleborus 'Penny's Pink' will perform best in a position of partial shade in a deep, moist yet well-drained garden soil, although it is also tolerant of fully shaded positions. Once planted the root system should not be disturbed as this can significantly reduce the amount of flowers produced the following season.

Trim the old leaves to the ground in late winter before the buds emerge, as this will allow the flowers to create their maximum impact.

For related articles click onto the following links:
HELLEBORE HEAVEN

HOW TO GROW THE GINGER LILY FROM SEED

Image credit - http://lindacochran.blogspot.co.uk/

The hardy ginger lily -  Hedychium gardnerianum is a gorgeous, exotic flowering plant that despite its tropical origins is tough enough to tolerate the cooler climates of temperate Europe. So robust is it that it can even be overwintered outside in the southern counties of England!

Yellow ginger lily in full bloom
Ginger lily in full bloom
Unfortunately pot grown ginger lilies are in short supply in the United Kingdom but if you are determined to obtain a few specimens for your collection then you can always grow them from seed.

Whether collected yourself or shop bought, sow ginger lily seeds as soon as possible to achieve the very highest germination rates. Using a large modular seed tray fill with a good quality compost such as John Innes 'Seeds and Cutting'. Gently water in and then allow  the excess to drain away. Sow the ginger lily seeds onto the surface of the compost at a rate of one seed per module and then give a very light covering of vermiculite. Do not bury the seed as it requires the presence of light to help initiate germination.

Place the modular tray inside a propagator and maintain a temperature of between 20-25 Celsius. If a propagator is not available the seal the tray inside a clear polythene bag. Move the tray to warm bright conditions but out of direct sunlight to reduce overheating and scorching the emerging seedlings. You can expect germination to occur within 21-60 days. During this period keep the surface of the compost moist but not waterlogged.

Once the seedlings have emerged remove the modular tray from the propagator or polythene bag but keep them under warm, bright conditions. When the roots have established in the modules carefully pop them out and transplant them into 3 inch pots containing a good quality potting compost such as John Innes 'No 2 or 3'. Do not disturb the root balls. Growth them on for a few more weeks and then gradually acclimatise to outdoor conditions for 10-15 days before planting out after all risk of frost has passed.  Plant them 24 inches apart in a rich, moist, well-drained soil in full sun or partial shade and with protection from cold winds. Alternatively plant them up in to large containers.

For related articles click onto the following links:
GINGER ROOT
Hedychium Or Ginger Lily
HOW TO GROW THE CALLA LILY
HOW TO GROW CANNA LILIES FROM SEED
HOW TO GROW THE FOXTAIL LILY
HOW TO GROW THE GIANT HIMALAYAN LILY - Cardiocrinum giganteum
HOW TO GROW THE GIANT HIMALAYAN LILY FROM SEED
DRACUNCULUS VULGARIS - The Dragonlily
THE PERSIAN LILY - Fritillaria persica
HOW TO PROPAGATE THE FOXTAIL LILY

THE BLACK HELLEBORE

The Black Hellebore

The single black hellebore - Helleborus x hybridus, is a stunning new hybrid that has been independently bred on both sides of the pond but with strikingly similar results. The first example is from the specialist breeders at Ashwood nurseries, England, while the other goes by the name of Helleborus hybridus 'Black Diamond' and is the result of a breeding program undertaken by Ernie & Marietta O'Byrne at Northwest garden Nursery, Oregon, USA. So similar are the two hybrids that there is little to tell them apart.

They are both hardy, evergreen perennials with a long flowering season in the spring that can stretch from January to April.

The 5-7 cm wide flowers are an incredibly dark purple which produces a rich velvety navy-black colouration. They have a wide, open structure, and unlike many hellebore hybrids which have blooms that hang downwards, the single black hellebore flower faces forwards, although the blooms of Helleborus 'Black Diamond' are more downward facing of the two making them a little less showy.

The plant can reach an approximate height of 50 cm once established and produces handsome leathery leaves. Like the flowers the leaves emerge a gorgeous deep purple but revert to green once they extend to full size.

The black hellebores will grow well in a position of full sun or partial shade in most ordinary, moist but well drained soils. They will perform at their best in slightly alkaline soils but will also tolerate acidic, heavy clays and thin chalky soils.

As similar are they are, the simpler, more rounded edged petal structure of the Ashwood hybrid combined with stronger contrasting creamy white stamens is in my opinion the superior of the two. However buy them when you see them as they are almost always out of stock due to the high demand from enthusiastic collectors.

By Nz Fauna - Own work, CC BY-SA 4.0, https://commons.wikimedia.org/w/index.php?curid=34203790

For related articles click onto the following links:
HELLEBORUS 'Penny's Pink'

HOW TO GROW HOT CHILLI PEPPERS FROM SEED

Image credit - http://dutchchilifest.nl/


While consuming hot chilli peppers can certainly be a challenge for most people, growing hot chilli peppers is actually surprisingly easy. Originating from the subtropical regions of America they can be grown outdoors in most warm temperate climates, including the cooler regions of northern Europe. However despite the shorter growing seasons of northern European countries, you can make the most of what there is by germinating chilli pepper seed early under protection and then extending the season by growing under the protection of a large cloche, polytunnel or greenhouse.

Image credit - http://www.athenacarey.com/
Sow chilli pepper seeds in 3 inch pots containing a good quality compost such as John Innes 'Seed and Cutting'. First water in the compost then at a rate of 1 seed per pot press the seed onto the compost surface. Do not bury the seed as chilli seeds require the presence of light to help initiate germination. You can however cover the seeds with a fine sprinkling of compost or vermiculite. Place the pots inside a heated propagator at a temperature of approximately of 18-25 degrees Celsius and position on a warm bright windowsill that does not receive direct sunlight. Alternatively seal the pots inside polythene bag.

The seedlings should emerge in 7-10 days, at which point remove them from the propagator or polythene bag. They can now be grown on in cooler conditions. Once the roots have established in the pots you can plant the seedlings outside once the threat of late frosts have passed which in the United Kingdom will be by the end of May or early June. They will need to be hardened off for a week or so first to prevent the young plants from becoming damaged from drying winds or being scorched by direct sunlight.

Image credit - http://www.sowandso.com/
Chilli peppers will produce the best crops when grown in a fertile, well-drained soil that has been previously enriched with plenty of well-rotted farmyard manure or garden compost.

If you can, position your crop with the added protection of a south-facing wall. Space chilli pepper plants at a distance of 50 cm apart.

The chilli peppers should be ready for harvesting in August and September. Growing them under the protection of a greenhouse or polytunnel will allow the plants to crop earlier and then extend the harvesting period to october and even the beginning of November.

For related articles click onto the following links:
T&M: How to Grow Chillies
HOW TO OVERWINTER CHILLI PLANTS

EUCOMIS BICOLOR

Image credit - http://www.southafricanbulbs.com/


Commonly known as the pineapple lily, Eucomis bicolor is a highly ornamental, low-growing flowering bulb from the Asparagaceae family. Native to Lesotho, South Africa it is a frost-tender perennial which will either need to be protected by a thick mulch over winter of brought in under protection in a frost-free environment when grown in cooler, northern European climates.

Image credit - http://www.pacificbulbsociety.org/
In its native habitat Eucomis bicolor is usually found on grassy streambanks and in forests at an elevation of no more than 2800 metres from the Eastern Cape to KwaZulu-Natal and Mpumalanga.

When new growth emerges in the spring it will form a large basal rosette of strap-shaped leaves which can reach between 10 and 50 cm in height depending on the species or cultivar. They are often seen spotted purple at the base.

However Eucomis bicolor is best noted for its dense raceme of star-shaped flowers which emerge on an erect stem during late summer and early autumn and topped by a crown of leafy bracts. Once in bloom the flower display will appear of a comparatively long 6-8 weeks.The overall flower effect is reminiscent of a pineapple fruit, which explains the common name.

Eucomis bicolor plants are usually purchased as pre-packed bulbs in the early spring or later on in the summer as pot grown specimens. Plant the bulbs 15cm deep in a fertile, humus-rich, well-drained soil. In temperate climates they will require a sheltered position in full sun, or grown in pots containing a good quality compost such as John Innes 'No 2'.  Eucomis bicolor will tolerate some shade, but the best flowering and foliage colour will occur in full sun.

For related articles click onto the following links:
HOW TO GROW THE GINGER LILY FROM SEED
HOW TO GROW THE WINTER ACONITE - Eranthis hyemalis
WINTER ACONITE - Eranthis hyemalis

HOW TO GROW SWEET CHESTNUTS FROM SEED

How to grow Sweet Chestnuts from seed


The sweet chestnut has been grown in Britain since its introduction during the Roman occupation. Popular for both its valuable wood and edible seeds, the sweet chestnut - Castanea sativa is a large growing deciduous tree native to southern Europe, north Africa and Asia Minor. The sweet chestnut is a long-lived tree, drought- tolerant species which produces an extremely ornamental display in July when in bloom.

Sweet chestnuts
It will perform best on moist, well-drained, though preferably rather light acidic soils. The sweet chestnut is moderately lime-tolerant and can be grown with reasonable success over chalk so long as there is a deep layer of soil over it.

Sweet chestnut seeds are best sown as soon as they are ripe. This is easily judged as when the time is right they will become exposed within the seed casing and naturally fall from the parent tree. Depending on summer temperatures this will usually be around October.

Plant them 2 cm deep in rows 12 inches apart in a prepared seedbed and water in. If the soil is particularly heavy then either use a raised seed bed for better drainage or plant them into 4-5 inch long-tom pots or large root-trainer modules containing a good quality, soil-based compost.

Sweet chestnut seedlings
Sweet chestnut seeds display no natural dormancy and will begin to germinate within a relatively short period so long as conditions are favorable.

Initial growth is surprisingly rapid and within a few weeks after emergence the seedlings can be between 10 and 20 cm high. The the seedlings will then rest for a few weeks before developing a terminal bud which break into rapid new growth so long as temperatures are not too cold.

Keep the compost moist and move pot grown plants into frost free conditions come the winter. Seedlings grown in nursery beds may require the protection of a dry mulch or a cloche.

Transplant all seedlings outside onto nursery tines the following autumn and allow to grow for a further 3-4 years. Lift the root-balls in the autumn and transfer to their permanent positions.

Note: Do not grow sweet chestnuts in too shallow a container as this can cause permanent root deformities that may lead to the failure of the tree once it matures.

For related articles click onto the following links:
GROW YOUR OWN CHESTNUTS
HOW TO GROW ARGYROCYTISUS BATTANDIERI
HOW TO GROW THE HOLM OAK - Quercus ilex
HOW TO GROW AN OLIVE TREE FROM SEED
HOW TO GROW PEANUTS
HOW TO GROW SWEET CHESTNUT
HOW TO GROW THE WALNUT TREE
WHERE DO PEANUTS COME FROM?
WHICH FRUITS AND NUTS ARE TOLERANT OF GROWING IN THE SHADE

HOW TO GROW SWEET CHESTNUT

Image credit - Andrew Butler/NTPL


The sweet chestnut - Castanea sativa is a fast-growing and large deciduous tree noted for its edible seeds and for its tannin-rich wood. Native to Europe and Asia Minor it is also commonly known as the 'Spanish chestnut' or simply 'chestnut'. Introduced to Britain during the Roman occupation the seeds have been used in cooking since ancient times and are most commonly served roasted. However sweet chestnuts are surprisingly versatile and can found as an ingredient in confections, puddings, desserts cakes, and bread making to name just a few. It can also be used as a coffee substitute!

Image credit - http://www.nhm.ac.uk/nature-online/british-natural-history/
Given favourable conditions the sweet chestnuts can attain a height of between 20–35 m, a spread of approximately 15-25 m and a trunk that is often 2 m in diameter. The trunk itself has a rugged, grooved bark, and appears to twist round as the tree matures. The oblong-lanceolate leave are mid-green in colour, prominently veined and toothed at the margin. Each leaf can be between 15-30 cm long and 5–10 cm wide.

Erect pale-green catkins 10-15 cm long are borne in July, and once pollinated are followed by large spiny burrs which contain the edible red-brown seeds. Each burr can containing 3-7 brownish nuts which are shed naturally during October.

The sweet chestnut will require a mild climate and adequate moisture for good growth making it ideal for warmer European climates. In fact they were a popular choice for landscaping in England, particularly in the 18th and 19th centuries. They will thrive in most, good garden soils so long as they are planted in a sunny position. However they will tolerate a certain amount of shade. They will perform best on slightly acidic soils and it should be noted that Castanea sativa is relatively intolerant of lime. Be aware that the sweet chestnut tree is sensitive to late spring and early autumn frosts.

The sweet chestnut - Castanea sativa received its Award of Garden Merit from the Royal Horticultural Society in 1984.

For related articles click onto the following links:
HOW TO GROW ARGYROCYTISUS BATTANDIERI
HOW TO GROW A COFFEE PLANT FROM SEED
HOW TO GROW LIQUIDAMBAR STYRACIFLUA
HOW TO GROW PEANUTS
HOW TO GROW SWEET CHESTNUTS FROM SEED
HOW TO GROW THE WALNUT TREE
BBC: HOW TO GROW SWEET CORN
Planting and caring for your Sweet Chestnut Tree
WHERE DO PEANUTS COME FROM?
WHICH FRUITS AND NUTS ARE TOLERANT OF GROWING IN THE SHADE

ACANTHUS MOLLIS

Acanthus mollis


Acanthus mollis, perhaps more commonly known as 'Bear's Breeches', is a handsome, robust hardy perennial noted for its architectural foliage. While at face value the name 'Bear's Breeches' may not make much sense it is believed to be a corruption from its 17th century Cornish name of 'Brank Ursine'. Brank Ursine means bear’s claws and relates to the shape of its flowers.

Acanthus mollis
Native to the Mediterranean region including northwest it is one of the earliest cultivated plant species. In fact there are records dating back which describe how the roots of Acanthus were boiled for poultices to cure burns, sprains, gout and even baldness. During the Roman conquest of Britain they were also grown for their ornamental value, in particular to line pathways.

Given favourable conditions, Acanthus mollis will reach an approximate height and spread of between 1 - 1.5 metres. The mid-green leaves are ovate and glossy and have a heart-shaped base and deeply cut, wavy margins. The white and purple flowers are produced on 150 cm spikes from July until August.

Acanthus mollis will perform best in a sunny or lightly shaded position in a deep, well-drained soil. Avoid disturbing the root system until the plants becomes overcrowded. Cut the stems back to almost ground level after flowering. Once established Acanthus mollis can show good drought tolerance. In warmer temperate countries you may need to provide shade from the hot afternoon sun to prevent scorching.

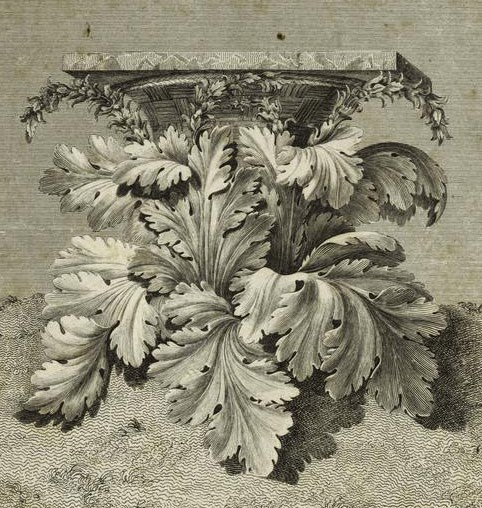
The leaves of this plant are considered by historians to have been the design inspiration behind the Corinthian column capitals of Greco-Roman architecture.

Acanthus and Corinthian columns

Legend has it that a well known Greek architect was walking by a graveyard in ancient Corinth when his attention was drawn to the grave of a young girl. The grave had been marked by a large basket positioned at its head which was weighed down a by a flat ceramic tile. The basket had been put in place over the winter, inadvertently on top of an Acanthus mollis.

Come the spring the new growth was forced to grow outwards beyond where the basket sat before it could emerge through the soil. When it did the foliage surrounded the basket like a nest of leaves and the tall spired flowers became distorted into graceful arches reflecting the basket’s fluted neck. The architect was inspired by what he saw and recreated the effect in a number of his columns. It soon became a popular demand for the Corinthians and so the fashion for such columns and their distinctive motif had begun.

For related articles click onto the following links:
HOW TO GROW ACANTHUS SPINOSUS
RHS: Acanthus mollis

THE JUDAS TREE

The Judas tree


The Judas tree  - Cercis siliquastrum is just one of approximately 12 species within the Cercis genus. Eight of them are native to the old world, (more specifically southern Europe and China), while four are native to the new world. Reputed to be the tree species from which Judas Iscariot hanged himself, the origin of its common name may actually be a little less dramatic. It is more likely that it is a corruption of the French common name, Arbre de Judée, meaning 'Tree of Judea'.

The Judas tree
Native to both southern Europe and western Asia Cercis siliquastrum is a small deciduous tree noted for its prolific display of flowers in late spring. Unlike the most flowering trees, the blooms are produced on year-old or even older growth, including the trunk.

The flowers are approximately 1 cm long, edible and purportedly have a sweet-acid taste. They can sometimes be damaged by spring frosts, so it is always best to site the Judas tree in a sheltered position away from strong northerly and easterly winds. Especially in cooler northern European climates.

It has a wide spreading habit with an approximate height of between 15-20 ft and a width of 10-15 ft. The leaves are broadly heart-shaped and somewhat glaucous. The blooms are a rich, rose-pink in colour, pea-shaped and borne in clusters of 3-6 on the naked stems, branches and trunk.

Once pollinated, flat, purplish seed pods approximately 12 cm in length are freely set, turning red-tinted as they ripen in late summer.

The Judas tree will perform well in any good garden soil positioned in a sunny or partially shaded site. However it will do best in deep, well-drained soils.

The cultivar Cercis siliquastrum 'Bodnant' gained the Royal Horticultural Society's Award of Garden Merit in 2014.

For related articles click onto the following links:
NHM: The Judas Tree
HOW TO GROW ARGYROCYTISUS BATTANDIERI
HOW TO GROW CERCIS SILIQUASTRUM
HOW TO GROW THE FRANGIPANI TREE- Plumeria rubra var. acutifolia
HOW TO GROW SWEET CHESTNUT
THE CANNONBALL TREE -  Couroupita guianensis
THE MIMOSA TREE - Acacia dealbata
THE ‘NATIVE’ TREES OF ENGLAND
THE SILVER BIRCH - Betula pendula