HOW TO GROW BLACKCURRANTS

How to grow blackcurrants


With increasing competition from imported exotic fruits the old fashioned blackcurrant has been falling out of favour since the Second World War. For years it has been the ‘preserve’ of jams and fruit cordials, but recently it has gained a new identity as one of the latest additions to the recent super food craze.

Blackcurrant jam
On English soils the blackcurrant is relatively easy to grow although they will do best on a slightly acidic, heavy clay loam situated in a sunny, sheltered site away from strong winds and late frosts. Preparation is - as always - important so before planting, dig over your soil adding plenty of well rotted farmyard manure. On lighter soils you may also wish to add leaf mould or any other organic matter as this will help to reduce its free draining properties and typical leaching of nutrients.

Blackcurrant bushes are usually bought as pot grown plants but you may also be able to purchase them bare-rooted from specialist nurseries during their dormant period of November to February.

As blackcurrants produce fruit on stems grown the previous year it’s important to achieve a regular supply of fresh growth year on year. This is done by either growing it as a multi-stemmed bush or by using the ‘stool’ method which allows the bush to grow out from a single basal stem. By raising the main bush up from the ground this way you are also allowing good air flow around your plants and in so doing reducing the incidence of grey mould which can be particularly troublesome in most soft fruits.
Blackcurrant nursery bed

Water your plants well after planting and continue to do so during hot dry weather in the first year as blackcurrants are relative shallow rooted.

Space the bushes between 5ft and 6ft apart depending on the variety, and for all new plants cut back all the growth to a couple of inches of soil level.

If you are you are growing a multi-stemmed bush then you have nothing more to do, but if you want to encourage stooling then you need to remove all but one healthy stem which again is cut back to within a couple of inches of the soil line. These can now be left for two more years before they need pruning again

Blackcurrant fruits on stem
In subsequent years mulch your bushes every spring with a well rotted farm manure, this will help to add valuable nutrients to the soil, conserve moisture and help to keep down the weeds as blackcurrants have difficulty competing with them. If your plants are growing strongly then you may wish to change your mulch to something less rich such as straw, leaf mould or wood chips.

WHY ARE THE LEAVES ON MY LEMON TREE TURNING YELLOW?

Lemon leaves turning yellow
Why are the leaves on my lemon tree turning yellow

If you have ever grown lemon trees before then you will know that they are not a particularly difficult species to look after. However, it doesn't take long for those glossy, green leaves to start losing their rich, verdant colour.

Rows of pot grown lemon trees
Lemon nursery
Whilst the new growth will still open out in that gorgeous bronze colour, they eventually mature to a light green, maybe a yellowish green, or worst still with interveinal yellowing. Why should this be?

Well, if you are from northern Europe then your specimen lemon tree was probably produced in that famous, north Italian growing region of Pistoia.

There you will find row upon row of stunning citrus specimens - all pot grown - connected to nutrient rich, drip feeds.

So why should there be a problem when you get your lemon tree home.

The problem is this. If your soil has a neutral pH or worse still veers on the side of alkalinity then your lemon trees will have difficulties when it comes to taking up the nutrients iron and magnesium through the roots. This is a physiological disorder known as Chlorosis. Unfortunately lemons have a particularly high need for magnesium, however, knowing this means that you can treat the problem.

What is Chlorosis?

Chlorosis is a common term used to describe symptoms of uniform yellowing of leaves.

It may be caused by any number of stresses and although it can affect many plant families is is most commonly seen in acid loving plants - generally known as ericaceous, but this is not strictly accurate - such as Rhododendrons, Camellias, Pieris, Liquidambar and of course citrus.

Yellowing lemon leaves
Chlorosis on citrus
In alkaline soils, plants from the Ericaceae family have difficulties in taking up iron and magnesium from the substrate through the roots. This is typified by the characteristic interveinal yellowing of the leaves as both iron and manganese are vital for the formation of the green chlorophyll pigments within them.

This characteristic patterning is a direct response to these specific nutrient deficiencies and occur because the chlorophyll pigment found in the vascular bundles – the leaf veins – will remain unaffected for longer periods than chlorophyll pigment found in the cells between the vascular bundles.

Also, because of the low mobility of iron within the plant and relatively higher concentrations within older leaves due to the formation of iron binding proteins, leaf discolouration is far more prevalent in the new, juvenile leaves found near to the growing points. In extreme cases newly formed leaves can grow through almost pure white in colour.

How do you treat chlorosis

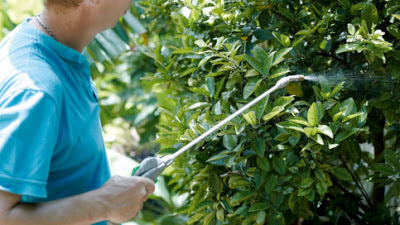
Spraying lemon trees with foliar feed
Foliar feeding lemon tree
Chlorosis can be treated by spraying the leaves with soluble iron foliar feeds every 2 - 4 weeks or by lowering the soil pH.

This is achieved by applying chelates, ferrous sulphate, aluminium sulphate, or sulphur to the soil surface and allowing them to dissolve into the soil by watering and rainfall.

A traditional method used by Victorian plantsmen was to add a tablespoon of Epsom salts, dissolve it in half a gallon of water and water it in at the base of the plant. Alternatively, apply as a foliar spray.

Epsom salts are the common name for magnesium sulfate and are used to correct magnesium deficiencies in soil.  This is something that lemons are particularly prone to as they are particularly magnesium hungry.

At the very least, use soluble, acidic plant fertilisers such as Miracid or Sequestration as a weekly liquid feed. Be aware that it will take weeks and not days for the effects to show through.

How do the Italian growers solve this problem?

Epson salts on a wooden spoon
Epsom salts - image care of www.motherearthliving.com
Well, as mentioned before, the irrigation drip pipes also have nutrients pumped through them. Nitric acid is also added to the nutrient mix which helps to prevent the buildup of nutrient scum inside the irrigation pipes.

The nitric acid also reduces the pH within the soil enabling the uptake of iron and magnesium and also providing additional nitrogen to the roots. The upshot of this is dark green, glossy leaves. However, once you take the lemon tree off the irrigation system and water it straight off the tap, nutrient issues arise and the leaves begin to turn yellow in response.
.
For more information click onto:

WHY IS MY TREE FERN DEAD?

Why is my tree fern dead?


Before I start, I am going right back to basics. Why? Because there is a difference between knowing and understanding. Knowing why your tree fern has died is one thing - too cold, too dry or both. But understanding how this has killed off your precious, and usually expensive tree fern will prevent you from the ignominy of having to explain why that ugly, dried out trunk is doing 'pride of place' in your garden.

You could be unlucky and find that your tree fern has been attacked by some catastrophic fungal infection. But lets face it, it is unlikely and if you do have an fungal disease it has probably taken hold because the plant has become weakened. Tree ferns are tough, if they weren't then they wouldn't have survived the past 80 million years.

Dicksonia antarctica
Firstly, and tree ferns aside, put your hands up if you can tell me how many tree species can survive if you cut their roots off?

Secondly, how many regular ferns can survive if you cut their roots off?

Ignoring all those wiseacres who mentioned mistletoe - which still has a root system otherwise it would fall off its host tree - the answer is none. So why do so many of us believe that tree ferns are perfectly capable of surviving, in fact thriving without roots? This is probably down to our perception of the plant when we first purchase one. Tree ferns have had their root system sawn off when they are imported to our country and yet we witness with our own eyes that they are still capable of throwing up strong shoots from the crown - a miracle indeed!

How is this possible? Well, within the fibrous trunk there is a series of thick tap-roots that run from the crown of the plant, down to the base of the plant. Because the original thick head of foliage has also been removed to prevent these roots from drying out during transportation, there is enough water and carbohydrate in these internal tap-roots to power out one last round of fronds.

Typical garden centre specimen
Of course, watering both the crown and the entire length of the trunk will allow the root system to take up the necessary amount of water required to survive, but don't forget that without an complete and operating root system you are going to need to water the trunk in this way up to three times a day. Even more if you have positioned your tree fern in full sun!

The next issue is nutrition. How many times have you seen tree ferns kicking around your local plant retailer with stunted and pale green fronds. Too many in my experience. Look at any images of tree ferns in their natural environment and you will see thick, dark, luscious green foliage. Look in the garden centre - and perhaps even your garden - and you will see something that looks like a neglected, yellow bonsai on a stick. So what has gone wrong? It goes back to the root system and watering. Without a soil based root system the tree fern is unable to take up the macro and micro nutrients that it requires to grow. No nitrogen, no chlorophyll, no growth.

Unfurling tree fern frond
Therefore it is not enough to water regularly, you need to feed regularly too. If you are forgetful than place a small handful of controlled release fertiliser - such as osmocote - in the crown. If not, water the tree fern with a water soluble fertiliser such as Miracle-gro. There is no harm doing both.

Get this right and your tree fern will have enough water and fertilizer to support itself until it has regrown a root ball large enough to support itself without your help.

Back to overwintering. I am not going to go into the details of how to protect tree ferns over winter as this has already been covered in a separate article. However, I will say that if your tree fern is relatively new and still without an effective root system you will still need to water during warm spells. Forget this and you can still end up with a dried out husk when you remove your winter protection. In my northern European garden I have a habit of removing the protection during the day when it is reasonable warm so that I can water and then replace the protection before nightfall.

For related articles click onto:
Grow Tree fern Seeds
HOW TO FEED TREE FERNS
How to Grow Painted Ferns
HOW TO GROW TREE FERNS
HOW TO OVERWINTER TREE FERNS
HOW TO PROTECT TREE FERNS OVER WINTER
HOW TO WATER TREE FERNS
The Devil's Hand Tree -  Chiranthodendron pentadactylon
What is Air Layering?
When do Tree Ferns put out New Fronds

THE SECRET TO GROWING GIANT LEMONS

The secret to growing giant lemons - Can you do better?

Have you ever wanted to impress your fruit growing friends with exceptionally large lemons? The chances are that you probably haven't, but the need to grow bigger and better fruit that your peers has been the goal of amateur and head gardeners for centuries.

The secret to growing giant lemons
So when it comes to growing enormous lemons there isn't really a secret formula.

You just need to be growing a cultivated variety that produces naturally large fruit.

Suitably large species and cultivated varieties include Citrine medica, the Ponderosa Lemon, and the Femminello Lemon.

Be that as it may, there are some cultivational points that you can employ in order to improve your chances.

Remove, also known as thinning out, half the juvenile fruit when they are about the size of a marble in order to encourage the remaining fruit to grow larger.

Lemon trees are more sensitive to frost damage than other types of citrus so try to provide a frost free environment during the coldest part of the year. Furthermore, plant your lemon tree into a slightly acidic, free draining soil and provide adequate light, warmth, nutrition and water. Although the perfect nutrient breakdown is still argued by professionals try using  5-1-3 NPK with a monthly feed of trace nutrients.

It should go without saying that you should be relentless with pest and disease control - organic, of course.

So, just what is my secret to growing giant lemons?

The secret to growing giant lemons
Well, there is no secret as such, although I will admit to a little cheating.

While the tree is indeed a lemon tree, the giant lemon hanging from its branches was certainly not produced by it.

It was recently purchased from a lemon stall in Sorrento, Italy, and tucked carefully away in my suitcase for the flight back home.

A cotton cradle was carefully sewn into the top of the lemon by the future Mrs. Eaden, from which it was hung in place. Deception complete!

For related articles click onto:
AT WHAT TEMPERATURE DO CITRUS SEEDS GERMINATE AT?
DOES THE BUDDHA'S HAND CITRUS HAVE SEEDS?
How to get rid of black mould on a lemon tree

THE BLUE AGAVE PLANT - Agave tequilana

Harvesting the Blue Agave - Agave tequilana
The Blue Agave - Agave tequilana


The Blue Agave - Agave tequilana, is an important economic crop, native to the volcanic soils of Southern Mexico. Why so important? Because the blue agave is used to produce the base ingredient of that Mexican nectar known as tequila. Like other plants within its family, the blue agave grows to be a large succulent with spiky fleshy leaves that can reach an impressive 2 metres in height.

The blue agave thrives in the rich and sandy volcanic soils that are found at altitudes of more than 1,500 metres.

The Blue Agave - Agave tequilana
In their native environment, agaves will produce a tall and distinctive flowering stalk once they get to about five years old. This stalk will then grow an additional 5 metres topped with yellow flowers. If the blue agave is being grown for commercial reasons then this stalk is removed in order to save diverting energy away from the heart of the plant.

Agaves are an ancient family and so unlike most other insect pollinated plants, their flowers are pollinated by bats. In this case it is the native bat - Leptonycteris nivalis. Once pollinated, an agave is capable of producing several thousand seeds per plant. Unfortunately, once the blue agave has produced its seed it will die. However, all is not lost as suckering basal shoots would have emerged from the base of the dying mother plant.

For related articles click onto:
AGAVE
Agave lophantha 'Quadricolor'
Grow Agave Seed
HOW TO GROW AECHMEA FASCIATA
HOW TO GROW AGAVE
HOW TO GROW THE HARDY ALOE - Aloe striatula
HOW TO GROW PEYOTE FROM SEEDS
HOW TO GROW PRIZE WINNING CACTUS
IS AGAVE NECTAR BAD FOR YOU?
THE BLUE AGAVE
The Brain Cactus - Mammillaria elongata 'Cristata'
The Monkey Puzzle Tree - Araucaria araucana
The Mr T Cactus
The Starfish Flower - Stapelia flavopurpurea

HOW TO MAKE LIMONCELLO

Limoncello kitchen in Sorrento
How to make limoncello

If you have spent any time in southern Italy, and in particular Sorrento, you will find that almost everyone and anyone is producing and selling home made Limoncello. From pizza parlours to small factory set-ups in high street shops, wherever you go you can find yourself being offered free tasters of someone's secret family recipe.

How to make limoncello
Unfortunately, with my old man tastes buds, all Limoncello's taste the same, but is no bad thing as that just means they all taste amazing.

The problem is that once you have finished off the non-breakable bottle you smuggled home in your luggage, you are left wanting more but can't justify the air fare to purchase another bottle.

Of course you can probably buy a Limoncello facsimile in your local supermarket, but why bother if you can pool the raw ingredients yourself and manufacture your own family brand of 'unique' Limoncello I am aware that it is far easier to just buy a bottle down the road from Tesco's, but that isn't the point of this article.

Ingredients

How to make limoncello
Limoncello is made using only four ingredients:

Fresh lemons
Alcohol
Water
Sugar

You will also need a number of bottles.

The lemons need to be fresh and organic as any chemical sprays used on the lemons will taint the final flavour. The water has to be of excellent quality. Tap water should be fine, but if you are not convinced then use mineral water. Sugar has to be refined white, otherwise the Limoncello will end up looking muddy. The best alcohol to use is clean and clear 90% or 95% (180-190 proof). While this is easily obtainable in Italy you may not be so lucky where you live. In which case consider using Vodka instead.

The two recipes below are for both alternatives. The ‘pure’ alcohol version will give you a Limoncello at a very pleasant 31-32% liqueur; the Vodka version will get you to 28-29%, which is still very good.

With 95% alcohol

Wash 6 large or 10 small lemons thoroughly in cold water and dry. This is to remove any dirt or reside that may be on them.

How to make limoncello
Scrape or grate the lemon zest, but only the yellow skin. Do not go into the white pith and certainly no juice. Place the zest into a completely clean 1.5 litre bottle that has a air tight sealable top.

Now pour in 1 litre of 90% or 95% clean and clear alcohol and seal the lid. This can now be stored in a cool dark place.

Leave for 4 weeks, but give the bottle an occasional shake. During that time, the alcohol pulls the colour and the essential oils from the lemon zest.

When the four weeks are up, boil 1.5 litres of pure water in a clean pan. Once it boils, turn the heat down to simmer and add 400g of refined white granulated sugar. Keep stirring the sugar until it dissolves then turn off the heat and let the syrup cool down until its just about tepid.

Prepare the bottles you are going to use for storing the Limoncello - re-used 750ml fizzy pop bottles will do, so longs as they are properly clean.

How to make limoncello
However, if you are making limoncello on a regular basis then it may well be worth investing in some old fashioned glass bottles with the rubber ring, stopper and metal latch.

At this stage you will have 3 litres of liquid, so you will need at least four of these 750ml bottles

Use a funnel and pour the alcohol mixture into a decanting bottle first. This is to separate out the liquid from what remains of the lemon zest. If you prefer you can put the zest into a muslin bag to squeeze out the last remaining alcohol.

Pour the filtered alcohol into the pan with the syrup and stir gently. Once fully mixed, use the funnel to pour the fresh Limoncello into your bottles and cap them.

Limoncello is best served cold you your new batch can be placed in the freezer until required.

With 40% Vodka

For this recipe you will need more lemons - 8 large or 12 small - as the weaker alcohol level won’t be as effective. Everything else regarding the preparation of vodka Limoncello is exactly the same as above. However, the quantities are slightly less. Instead use 1 litre of water and 300 grams of sugar

Good luck and good health.

For related articles click onto:

SORRENTO LEMONS

Sorrento lemons

If you have ever travelled the roads along the Amalfi coast then you have probably noticed the huge number of fields that are devoted to lemon production.

The introduction of the varieties of lemons grown on the Amalfi Coast and the coastline surrounding Sorrento date back to Roman times, and have changed very little over the passing 2 millennia .

In fact, mosaics and paintings that survived in ancient Roman villas in Pompeii and Herculaneum show lemons that are shaped remarkably like those grown in Sorrento today.

Sorrento lemons
However, it wasn't until much later, from the 10th-11th centuries, that the cultivation and production of lemons would start to become an important part of the economy on the Amalfi Coast and Sorrento.

Cultivated under traditional, tall wooden frames, these lemon groves require protection from cold winter winds, rain, hail and - rather surprisingly, the occasional frost.

And when I say tall I mean it, you can be looking at frames of up to 5 even 6 metres tall.

Why? Because the lemon varieties grow in Sorrento can get as tall as 8 metres. They are easy to spot as they are often left to protrude through the netting and have their fruit unharvested.

The tops and sides of the wooden structures were traditionally covered with a kind of rush, twig or bamboo matting - something that you can still see. However, growers are now starting to modernise and converting over to black plastic shading

Sorrento lemons
The inhabitants of the small town of Sorrento are rightly proud of their lemons. In fact, these locals believe that their lemons are the best in the world!

Found in Campania region of southern Italy, sorrento lemons - otherwise known as the Limone di Sorrento, Ovale di Sorrento, Massese or Massa Lubrense lemon, is a highly regarded lemon variety whose popularity outside of the United States rivals that of the Eureka.

Even as late as the turn of the twentieth century, Sorrento lemons were sold individually and could only be handled by women who had to have trimmed nails and wear cotton gloves to handle them. Why? Well, the rind of the Sorrento lemon is relatively fragile and any damage to it will quickly allow fungal rots to take hold.

Me purchasing private supplies of limoncello
The Sorrento lemon has a lemon drop yellow, highly fragrant, medium-thick peel. Its ovate in shape with tapered ends.

The pulp is translucent yellow in colour and yields a large quantity of semi acidic juice. Although the flesh is very low in seeds and often found to be seedless, the lemon cannot be sold as a seedless variety.

In Italy the Sorrento lemon is the lemon used in the making of the popular and very tasty Italian liqueur, Limoncello. In fact 60% of the lemons cultivated are reserved for Limoncello. It is also the most widely used lemon for fresh consumption in Italy.

In November of 2000 Sorrento lemons earned their own IGP recognition (Protected Geographical Indication), similar to the prestigious AOC designation for cheeses.

For related article click onto:
AT WHAT TEMPERATURE DO CITRUS SEEDS GERMINATE AT?

HOW TO GET TO THE NAPLES NATIONAL ARCHAEOLOGICAL MUSEUM FROM SORRENTO


If you are checking 'Trip Advisor' or looking at Google maps to see how to get to the Naples National Archaeological Museum then everything will look pretty straight forward.

There is a metro station right next to the museum, so how hard can it be?

Napoli Garibaldi train station
Well it turns out that physically getting yourself to the Naples National Archaeological Museum is a bit of a mission.

Especially when the directions on 'trip Adviser' tell you to get off at the wrong train station.

If you are travelling from Sorrento then you take the circumvesuviana train from Sorrento train station that terminates at Napoli.

But don't get off at Napoli station or you will be in for a 15 minute walk back to the station you really want which is Napoli Garibaldi.

Why? Because that is the station that connects to the metro line.

Once you arrive at Napoli Garibaldi you can purchase return tickets to Cavour. This is just one stop on from Naples Garibaldi.

It is on Line 2 and you pick it up from platform 4. make sure you confirm the platform in case it has changed since writing this article.

It is when you get to Cavour that things get tricky as this station is also linked to another metro station called 'Museo'.

Now you will read that you leave the station at Cavour, and the Naples National Archaeological Museum will be 100 yards on the left.

Well you can stop right there because it doesn't.

There is a warren of stairs, travelators and escalators that need to be overcome before you are anywhere near the correct exit, and guess what - there are no signs to help you!

What you do is this.

You remain inside the metro station and make your way towards 'Ai treni Linea 2' until you find a tobacconist shop sited at the end of a corridor.

Once you have found the tobacconist there will be a 'hidden' corridor leading off to the left that you were unable to see before until you reached the tobacconist.

From this point there will be two sets of travelators leading you into the distance.

Get on them to the end where you will find a sign for 'Museo Nazionale' and an arrow that leads you to set of enclosed stairs that go up about three flights.

This then opens up to what looks like another station entrance, but filled with Roman statues and archaeological affects.

Have a look around if you wish - but these are all copies.

Instead you will need to find the exit and then you turn left and walk 100 meters to a flight of steps that finally lead you to the main entrance of Naples National Archaeological Museum.

Naples Archaeological Museum - finally!
Well done, enjoy your visit although you may find that sections of the museum are closed if not enough staff turned in that day, or that some of the better exhibits are on loan to other museums.

Although there won't be any signage for this either, if you are over 18 don't miss out on the 'Secret Room'.

For related articles click onto:
HOW TO GET TO THE NAPLES NATIONAL ARCHAEOLOGICAL MUSEUM FROM SORRENTO

TRACHELOSPERMUM JASMINOIDES

Trachelospermum jasminoides
I have to confess that of all the highly scented flowering plants, Trachelospermum jasminoides is my absolute favourite. It may not produce the most showy of flowers, and it may not have the strength of scent of a Gardenia, but for flowering longevity and consistency of perfume I challenge you to find a better plant for the northern European gardens.

Travel your way down to the warmer climates of southern Italy, and you will see Trachelospermum jasminoides - otherwise known as the 'Indian star jasmine' - liberally planted along with the brasher climbing plants such as the Trumpet vines - Campsis species, and the more traditional Bougainvillea.

Trachelospermum jasminoides
Of course, as you sit by the hotel pool, sipping margaritas and enjoying that warm jasmine fragrance as it wafts over you, you can be forgiven for thinking that Trachelospermum jasminoides will not be hardy enough to survive a typical English winter.

Evergreen and compact, the Trachelospermum jasminoides is a native to eastern and south-eastern Asia. However, as the more exotic climbing plants go, it is a lot tougher than you think.

When Indian jasmine vines first began to be imported in large numbers by the northern Italian growers, we were perhaps overly protective of these fantastic, climbing plants.

Free draining soil, on a protected south-facing house wall was the order of the day and it certainly wouldn't hurt to cover it in some frost protection over the winter. While these protective measure still hold true for gardens in the north of England, the Trachelospermum has proved itself to be a lot hardier than we first thought.

Trachelospermum jasminoides FLOWER
Nowadays, and with relatively low risk, you can bring your star jasmine out of the protection of a house wall and bring out into the greater garden. It will still do best against a protected wall, but will cope quite happily on a fence so long is is out of the way of cold, drying winds over the winter.

Once established in the ground, you can water the star jasmine reasonably freely during the growing season, but that will need to be knocked right down come the winter or you will risk the root-ball rotting off. You can get some yellow leaf discolouration, but this is down the star jasmines high fertiliser requirement. Top dress spring and autumn with well rotted farm manure and you may well need to liquid feed on a weekly basis during the growing period. If that doesn't fix it then move on to using an ericaceous feed.

For more information click onto:
HOW TO GROW BOUGAINVILLEA
HOW TO GROW BOUGAINVILLEA FROM SEED
HOW TO GROW CAMPSIS RADICANS
HOW TO GROW CAMPSIS  X TAGLIABUANA 'Madame Galen' 
HOW TO GROW THE MADAGASCAR JASMINE
HOW TO GROW SOLANUM JASMINOIDES 'ALBUM'
HOW TO GROW TRACHELOSPERMUM JASMINOIDES
HOW TO GROW WINTER JASMINE
HOW TO TAKE CUTTINGS FROM TRACHELOSPERMUM JASMINOIDES
THE MADAGASCAR JASMINE
THE TRUMPET VINE
TRACHELOSPERMUM JASMINOIDES

HOW TO GET TO HERCULANEUM FROM SORRENTO

Herculaneum ruins
How to get to Herculaneum from Sorrento


Travelling from Sorrento to anywhere is a relatively easy affair as Sorrento train station is a terminus for the Circumvesuviana Regional Railway System - known locally as Vesuviana.

All trains leaving Sorrento - wherever they end up going - will pass through the station 'ERCOLANO SCAVI' - the station you will be required to disembark at as part of your journey to Herculaneum.

However, this is not the case on your journey back. Make sure that when you reach Ercolano scavi station you take the Platform marked 'Pompei - Sorrento', otherwise you could end up at miles and hours away at the terminus of Poggiomarino or Sarno.

So, how to you get to Herculaneum from Sorrento?

Sorrento train station
You can purchase your tickets in the small newsagents found to the right of Sorrento station. It currently costs 2,20 Euros one way.

I will suggest that you buy return tickets here in order to save faffing about at the other end. You will be far too hot and tired from 2 or 3 hours of walking around in the baking hot sun surrounded by raucous groups of chubby, sunglass sporting children to stand in more queues.

As mentioned before, this is very straight forward. Any train leaving Sorrento will pass through ERCOLANO SCAVI, just make sure you don't jump the gun and get off at 'ERCOLANO MIGLIO D'ORO' by mistake.

The trains are a bit dirty and generally covered in graffiti, but considering how cheap the tickets are I don't see how anyone can really complain.

Ercolano Scavi station
You are best off sitting on the left hand side of the train as this will expose you to the best views of the Amalfi coastline, however a large part of the journey will be in complete darkness as you travel through tunnels cut out of the volcanic rock. The journey takes about 50-60 minutes.

Be aware of poorly trained musicians who will be travelling along with you, pestering for money. If you allow them to, they will damage your finances as well as your hearing!

Once you have arrived and left the station all you simply do is walk downhill along the main road towards the sea. After all, Herculaneum was originally a seaside port.

The walk takes about 15 minutes in total, do not wander off down any side streets as eventually you will find that the entrance was directly in front of you all along.

Herculaneum ruins
Herculaneum ruins
The entrance itself is an impressive brick and white plaster gate - similar to a triumphal arch.

Once you have made you way to the ticket office, follow the path towards the Audio Guide Kiosk. From there, rather than follow the crowds through the main entrance, turn left into a long tunnel that takes you to what was once the town's beach front properties.

From here you get a real insight as to how deep Herculaneum was buried and how much work was involved in excavating it. Look carefully and you can still see the pick axe marks made by the early work teams.

Remember to wear appropriate footwear and take plenty of water and sun cream.

For related articles click onto:
HOW TO GET TO HERCULANEUM FROM SORRENTO

HOW TO GET TO POMPEII FROM SORRENTO

Pompeii ruins
How to get to Pompeii from Sorrento


Travelling from Sorrento to anywhere is a relatively easy affair as Sorrento train station is a terminus for the Circumvesuviana Regional Railway System - known locally as Vesuviana.

Sorrento train station
All trains - wherever they have come from - which pass through the station 'POMPEII SCAVI' as part of their journey can only continue towards Sorrento train station as this section of the line does not fork off to any other destinations.

Make sure that before you start you journey that you are wearing sensible shoes and some of the pavements are extremely uneven.

Furthermore, do not underestimate how hot it will get with the sun beating down and reflecting off the stone streets and buildings.

With this in mind make sure that you take plenty of water and wear plenty of suncream. During the heat of the day and especially during the summer, don't forget sunglasses and a suitable sun hat. Trust me, 3 hours walking round the ruins is going to be tiring even if it isn't hot.

So how to you get to Pompeii from Sorrento?

Pompei Scavi train station
As mentioned before, this is very straightforward - so long as you aim for the correct station.

This is because some confusion can arise regarding the stations names. Why? Because there are two Stations at Pompeii.

The first is 'POMPEII', while the second is 'POMPEI SCAVI'. Luckily, the 'Pompei' station in on a different line to the one that leaves Sorrento station.

The station you want is 'POMPEI SCAVI' - Scavi meaning 'ruins'.

You can purchase your tickets in the small newsagents found to the right of Sorrento station. It currently costs 2,20 Euros one way.

I will suggest that you buy return tickets here in order to save faffing about at the other end. You will be far too hot and tired from 3 or 4 hours of walking around in the baking hot sun to stand in more queues.

Circumvesuviana train carriage
Circumvesuviana train
As I said earlier, you can get on any train at this station as they will all pass through Pompeii Scavi.

The trains are a bit dirty and generally covered in graffiti, but considering how cheap the tickets are I don't see how anyone can really complain.

You are best off sitting on the left hand side of the train as this will expose you to the best views of the Bay of Naples, however a large part of the journey will be in complete darkness as you travel through tunnels cut out of the volcanic rock. The journey takes about 35-40 minutes.

Be aware of poorly trained musicians who will be travelling along with you, pestering for money. If you allow them to, they will damage your finances as well as your hearing!

Street stalls on the road to Pompeii
You leave the station using the underpass. A point of interest is that there is a toilet in the underpass which costs 1 Euro - something you may well need after your journey, especially as most people exiting with you will refuse to pay it and instead hold on to it a bit longer.

There are of course toilets at the entrance to the Pompeii ruins, but remember that most of the passengers who were on the train are now walking next to you and they all want to be first in line at the next, free, toilet opportunity.

Once you have reached the station exit turn right, and walk along the street stall until you reach the entrance to the ruins a couple of minutes up the road.

The entrance to Pompeii ruins
When travelling back you will need to return to Pompeii Scavi station.

Remember to validate your return tickets in the push box by the doors leading out to the platform. If you forget and are asked to produce them invalidated to a ticket inspector then expect to pay a fine.

You will pick up your train from platform one to Sorrento, which is on the other side of the platform. If there are any seats spare then try and sit on the right hand side for the return journey.

Remember to take plenty of water and sun cream.

For related articles click onto:
HOW TO GET TO POMPEII FROM SORRENTO

WHEN DO TREE FERNS PUT OUT NEW FRONDS?

tree fern new frond
When do tree ferns put out new fronds?


Like other ferns, tree ferns will have a period of dormancy over the winter and break out into new growth in the spring. The trouble is that they are usually late in developing new fronds when compared to the more usual native or regular ornamental ferns.

New stock imported from the forests of Australia Tasmania and New Zealand will be in what is considered to be prime condition - even though they would have had both their roots and foliage removed. Even so, these tree ferns will have enough of an internal root system, and energy stores to start producing new fronds by the end of April - I am talking northern European climates here.

Young tree fern fronds
If you have purchased poorly maintained stock from a retail plant outlet, but have made efforts to supply a solid watering and feeding regime since taking ownership then you can expect your tree fern to unfurl its first frond in early to mid May depending on how the weather pans out.

If you are extremely careful then you will be able to feel the embryonic fronds as early as February - just try not to break them.

Be aware that a warm dry spring can easily kill off this new growth if the tree fern if it is not regularly watered, and I mean sufficient water to both the crown of the tree fern as well as its trunk.

If these early fronds do dry out then your tree fern is unlikely to survive into the following year.