HOW TO GROW HOLLYHOCKS FROM SEED

How to grow hollyhocks from seed


Hollyhocks are a mainstay of the traditional cottage garden. In fact, so close is the association to this particular garden style that they can be accused of 'by proxy' type casting.

How to grow hollyhocks from seed
Pink blushed hollyhock blooms
Why? Because they are so iconic to that particular setting, they are almost never used in any other garden design - and that is a real shame!

Massive leaves, enormous height, and flowers as numerous and as colorful as anything that you will see in a tropical rainforest.

Therefore, gardeners need to see past their preconceptions and realize that this highly impressive yet inexpensive plant can be a star performer in any garden, so long as it is planted in the right place.

Growing Hollyhocks from seed

The easiest way to grow Hollyhocks from seed is to grow them outside in shallow drills 9 inches apart, in June or July.

Once they have germinated they can either be thinned out and left where they are or allowed to grow on until September or October where they can be lifted and planted into their final position at a distance of 24 inches apart.

If you want to get an early start then you can sow your hollyhock seed indoors as early as February.

How to grow hollyhocks from seed
Hollyhock seedling - Image credit mytinyplot.com
To begin with, sow seeds onto the surface of a good, free-draining, damp, good quality compost such as John Innes 'Seed and Potting'.

Cover the seed with a very fine sprinkling of compost or vermiculite. Place in a propagator or seal container inside a polythene bag at a temperature of 15-20C (59-68F) until after germination which usually takes 14-21 days. Do not exclude light as this helps germination.

Alternatively, sow in late summer in a cool greenhouse and then overwinter plants in cool, well-lit conditions. Plant out the following spring. This method produces larger plants and is recommended if the soil is heavy or badly drained.

Transplant seedlings when large enough to handle into trays or 7.5cm (3in) pots. Gradually acclimate plants to cooler conditions for a few weeks before planting out after all risk of frost 45cm (18in) apart.

Hollyhock cultivation

How to grow hollyhocks from seed
Hollyhock border
Hollyhock flowers are borne in long succession on tall stems up to 3 meters high. They come in a range of rich and delicate colours, from the deepest crimsons and maroons, to blush pinks, whites and pale yellows.

Most hollyhocks are technically biennials - producing leaves the first year and flowers the next. However they will often last longer than two years and so can be described as short lived perennials.

Hollyhocks love a deep, rich, loamy soil - but they will often thrive without it. Because of their height, plant hollyhocks in a sheltered position, but if this isn't possible then they will need to be staked for support. Water freely during dry weather and apply and annual mulch of well rotted manure in the autumn.

There is a long succession of flowers, and as the lower blooms fade they can be picked off so that the plant is not weakened by producing seed.

TOP TIP. When flowering is over for the season the plants may be cut down to about 15 - 20 centimeters high and the stump covered with wood or coal ashes - if available. This will help to keep the slugs and snails away, allow water to drain away from the soft stem, and keep your hollyhock plants going  for several more years that you could otherwise expect.

For related articles click onto:
Agave
Dracunculus vulgaris - The Dragonlily
HOW TO GROW THE FRANGIPANI TREE- Plumeria rubra var. acutifolia
HOW TO GROW HOLLY FROM SEED
HOW TO GROW LUPINS FROM SEED
HOW TO GROW THE RED HOT POKER
HOW TO GROW RED HOT POKER FROM SEED
HOW TO GROW RUDBECKIA FROM SEED
How to Grow the Sago Palm from Seed
HOW TO SOW AND GROW HOLLYHOCKS
The Eyeball Plant
The Monkey Puzzle Tree - Araucaria araucana
Trachelospermum jasminoides
What has the Christmas cactus got to do with Christmas?

THE JAPANESE ANEMONE

The Japanese anemone


With high summer temperatures just around the corner, most people's gardens are starting to run out of steam, and that includes many public and pay-to-enter private gardens. This is of course perfectly natural, after all, northern European plants flower in the spring. That way they have enough time over the summer to produce and ripen their fruit so that it is ready for seed dispersal in the autumn. As we all should know, autumn is nature's time for sowing seed.

Image credit - http://kootation.com/
However, one plant at least seems determined to create its own flowers show and that is the utterly beautiful Japanese anemone - Anemone hupehensis

Although commonly called the 'Japanese anemone', Anemone hupehensis is in fact a native to central China, though it has been naturalised in Japan for hundreds of years.

The species was first named and described in Flora Japonica (1784), by Carl Thunberg who had collected dried specimens while working as a doctor for the Dutch East Indies Company. However it was the great plant hunter Robert Fortune who brought this lovely plant to England from China in 1844. During his explorations he noted that he often found Anemone hupehensis planted about Chinese graves.

For related articles click onto:
THE JAPANESE ANEMONE
HOW TO GROW THE JAPANESE ANEMONE
HOW TO PROPAGATE THE JAPANESE ANEMONE FROM ROOT CUTTINGS
THE WINDFLOWER - Anemone blanda

THE 'HOOKER'S LIPS' PLANT

Image credit - www.odditycentral.com


Looking like it should be on the cover of a Rolling Stones album, the Hooker's Lips plant - Psychotria elata is a genuine flowering plant and definitely not a random, photo-shopped image designed to fool innocent web surfers.

Hooker's Lips true flowers - image credit www.amusingplanet.com
Native to the tropical forests in places such as Costa Rica and Colombia, the Hooker's Lips plant is a small tree that uses its vibrant, red flowers to attract insect pollinators, but more specifically hummingbirds.

Relatively little is known about the Hooker's lips plants, although its habitat is usually found at an elevation of 400 meters and growing in damp soils that can be prone to waterlogging.

Unfortunately this extraordinary plant has become endangered due to the uncontrolled deforestation in its native homelands.

The 'lips' are not the plants true flowers, they are in fact modified leaves known as bracts.

Sadly, these bracts are only kissable for a short while, before they spread open to reveal the plant’s real flowers.

For more information click onto:
The Glory Lily - Gloriosa rothschildiana
The Oriental Poppy
The Marlborough Rock Daisy - Pachystegia insignis
The Plant Hunters

HOW TO GROW CROCOSMIA

Crocosmia species - www.botanicalgarden.ubc.ca


If you live in a northern European climate then hardy, truly red flowering plants are going to be in short supply. Therefore, if you are making up a top ten list (if you can find that many) Crocosmia species are a very easy win, and should be right at the top of the list.

Crocosmia 'Hellfire'- en.wikipedia.org
Native to the grasslands of southern Africa, Crocosmia species grow from small corms which produce upright, sword-shaped leaves and branched spikes of showy, funnel-shaped flowers in summer.

They are a good source of nectar for beneficial insects, but where they are grown in the southern United States they make a popular feed plant for hummingbirds!

One of the most popular cultivated varieties is Crocosmia 'Lucifer'. It is a hardy, clump-forming, perennial with sprays of vivid red flowers on stems to 1.2m in height. However, if you want an even deeper red then then consider Crocosmia 'Hellfire'.

Crocosmias require open, sandy, well-drained soil, but come the summer they are going to need plenty of water.

If you are planting corms in the spring, plant them 4-6 inches apart and 2-3 inches deep to form makeshift clumps. They will prefer the south side of a sheltered wall, or among groups of shrubs and perennials.

Crocosmias are easily propagated through division, removing offsets from the corm in the spring.

How to overwintering Crocosmia

Crocosmia corms - Image credit www.growsonyou.com
In particularly cold areas you may wish to lift the corms, remove the soil and leaves and dry off over winter in a frost free environment.

Storage can be difficult because the corms will rot off if kept damp. The trouble is, if they are kept too dry then they can shrivel up and die!

In warmer areas where frosts are unlikely to penetrate down to the corms, the corms can be left in place.

Just cut the dead leaves down to soil level in early March before the new foliage begins to emerge.

For related articles click onto:
CROCOSMIA 'HELLFIRE'
HOW TO GROW CROCOSMIA
HOW TO GROW CROCOSMIA FROM SEED
HOW TO GROW SCHIZOSTYLIS

THE ELEPHANT EAR PLANT

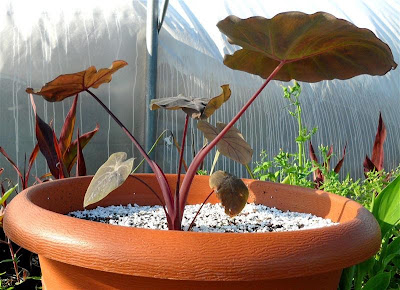
Mature elephant ears plant
The elephant ears plant


Large leaved, and tropical to the core, the Remusatia is an elegant herbaceous perennial that will thrive in reliably moist soils.

Young elephant ears plants in native habitat
The elephant ears plant
Commonly known as 'Hitchhiker's Elephant Ears', Remusatia is a small genus with few species distributed from East Africa to Yemen, Oman, the Himalaya region and southern and northern Australia.

The 'hitchhiker' part of the common name comes from the way the plant propagates itself. In its native habitat, Remusatia plants propagate by runners that travel just below the ground - known as stolons. These are densely covered with tubercles - bulbils.

Although remusatia are quite capable of flowering and setting seed, their main method of propagation is through the transportation of these bulbils by way of the local wildlife. Tiny hooks on the bulbils attach themselves to any animal or bird that happens to be passing by. When it falls off it has an opportunity to germinate away from the parent plant avoiding direct competition with it.

All Remusatia species have ornamental, oval foliage and in addition several species have showy flowers in summer. When growing for the garden, all Remusatia species are easily cultivated in any rich, well drained soil in partially shaded (summer) to sunny (winter) spot.

The time to plant up your Remusatia tuber is from June onwards once temperatures start to rise to 25°C.

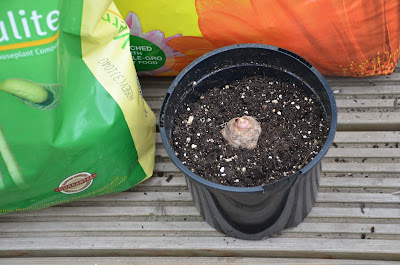
Elephant ears bulb being potted on
Potting on Remusatia bulb
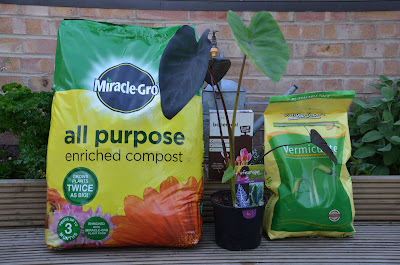
Use a good quality compost such as John Innes 'No 3' but add perlite of vermiculite for better water absorption and drainage, and a handful of bonemeal. Mix in well and then place the tuber just below the surface and water in gently.

As the plant begins to grow watering can be increased.

Several species may go dormant from autumn to spring. Keep dormant tubers on the dry side at a minimum of some 10°C. Get them too cold and wet and they will begin to suffer from fungal diseases.

For related articles click onto:
HOW TO GROW COLOCASIA
HOW TO OVERWINTER COLOCASIA
THE ELEPHANT EAR PLANT

HOW TO GROW LOTUS BERTHELOTII


As far as bedding plants go, Lotus berthelotii is arguably the most exotic of them all. Its soft, delicate foliage hangs like intricately crafted silver chains, while its exquisite flowers glow as though made from exotic, flame-coloured glass sculptures. As you can tell, I absolutely love this plant. But don't just take my word for it as Lotus berthelotii has also been awarded the Award of Garden Merit by the Royal Horticultural Society.

Canary Island Chiffchaff
image credit to http://ibc.lynxeds.com/users/christophe-gouraud
In its native habitat of the Canary islands, Lotus berthelotii is considered to be almost extinct as only a few individuals plants now manage to persist.

In fact, In 1884 it was already classed as "exceedingly rare", its decline blamed on its removal by eager plant collectors.

Its unusual flower design is believed to be an adaptation for bird pollination. It is thought that the original pollinators were sunbirds which had become extinct on the Canary Islands.

However more recent work has shown that these plants are adequately pollinated by non-specialist flower visiting birds, particularly the Canary Islands Chiffchaff.

How to grow Lotus berthelotii

Image credit - http://www.infojardin.com/
Lotus berthelotii is best grown in light, well-drained soils in full sun. However it will tolerate some partial shade in more Mediterranean climates, but you may see a reduction in the density of flowers.

With young plants, pinch out the tips of the stems as this will help to promote branching. Be careful with watering as too much or too little watering typically causes foliage drop.

This species will perform best with even moisture, but allow the top of the soil to dry off before re-watering.

The best flowering period will occur in the cooler weather of spring and early summer as they will naturally fall into a period of semi-dormancy to help cope with the hot summer temperatures.

They may even stop blooming altogether over the hottest period, particularly when nighttime temperatures remain at high levels.

For related articles click onto:
FROM WHAT PLANT DID THE LOTUS EATERS EAT THE FRUIT AND FLOWERS?
HOW TO GROW ANTIRRHINUMS FROM SEED
HOW TO GROW BRACHYSCOME
HOW TO GROW LOTUS BERTHELOTII

HOW TO GROW COLOCASIA

Colocasia specimen garden plant
How to grow Colocasia


If you are trying to create a tropical looking garden, but live in a north European climate, a little research will tell you that your options are going to be limited. Cannas, bamboo, and hardy palms are now a mainstay of council planting schemes, so to avoid having a garden that looks almost identical to a local roundabout you are going to need to be a little more adventurous.

Large Colocasia leaves
How to grow Colocasia
This is where Colocasia esculenta cultivars can come into play. Large leaved, and tropical to the core, the Colocasia is an elegant herbaceous perennial that will thrive in reliably moist soils.

Colocasia is a genus native to tropical Polynesia and southeastern Asia. The roots of the Colocasia esculenta are in fact edible and have been cultivated in Asia for more than ten thousand years.

Its common name the 'Elephant's-Ear plant' gets its name from the leaves which can be as large as 60 inches, which are shaped like a large ear or shield.

To get the best out of your plants in the garden they require three fundamental growing conditions, a rich soil, plenty of sun and plenty of water. Be aware that the leaves of Colocasia esculenta are designed to shed water, so even after quite a heavy rain shower it is not uncommon for the soil at the base of the leaves to be bone dry.

It is essential to the plants to get underneath the leaves with a hose and really soak the soil, especially in hot spells. If you hold back on the watering, your once stunning centrepiece will be looking ready for the compost heap!

potting on Colocasia
How to pot on Colocasia
You will probably find that soon after planting your plants may look as though they have stopped growing or even started dying off! Don't worry as this is quite normal as Colocasia are renowned for suffering from root shock. Keep them watered and in a couple of weeks things return to normal.

The plant can be grown in the ground or better still in large containers. They are grown outside year-round in subtropical and tropical areas but in temperate European regions, they are planted out for the summer and then lifted and stored over winter.

Growth is best at temperatures between 20 to 30 °C (68 to 86 °F), but the plants can be damaged if temperatures fall below 10 °C (50 °F) for more than a few days.

If you have bought your Colocasia as a section of root then plant it in a good sized pot, 10 inches or so, using a good quality compost such as John Innes 'No 3'.

You can also add a small handful of growmore, and vermiculite/perlite to improve water retaining qualities. The root tuber is typically planted close to the surface. The first signs of growth will appear in 1 to 3 weeks.

Image credit to www.briansbotanicals.net
When planting in the borders, the adult plant will need a minimum area of at least 10 sq ft of space. They do best in a compost-rich soil and preferably in the shade so that the soil doesn't dry out so quite so fast. Grow it in the sun and you will need to be on the ball with regards to watering.

The plants should not be left to go dry for too long; if this does happen, the leaves will wilt; watering will allow the plant to recover if done before they get too dry. Periodic fertilization every 2 to 3 weeks with a common plant fertilizer will increase foliage growth.

For related articles click onto:
Agave
HOW TO GROW COLOCASIA
HOW TO OVERWINTER COLOCASIA
THE ELEPHANT EAR PLANT

WHAT IS PERLITE?

Bulk bag of perlite
What is perlite?


Come propagation time (which of course can be almost anytime) and you may well find yourself walking along the isles of your local garden center asking yourself,

 '...what the flipping heck is perlite...?'

Green bags filled with what looks like white stone chippings seem to mock your ignorance. Especially when you pick it up to find out more and realize that the bag is empty! Ok, not so much empty, just very, very light.

Image credit to www.perlite.net
Put simply, perlite is an additive used to improve aeration and drainage in rooting mediums, usually a commercial grade compost. A quality that is particularly useful when it comes to propagating plants from seeds and cuttings

It turns out that perlite is a unique volcanic mineral which expands to about 13 times its original volume when it is heated to a temperature of approximately 1600 Fahrenheit - 871 Celsius. During the heating process, the mineral particles pop like popcorn and form a granular, snow-white material that is so light in weight it weighs only about 5 to 8 pounds per cubic foot (80-128 kg/cubic meter).

Image credit - stewardchem.com
Each particle of perlite is comprised of tiny closed air cells or bubbles. The surface of each particle is covered with tiny cavities which provide an extremely large surface area.

These surface cavities trap moisture and make it available to plant roots. In addition, because of the physical shape of each particle or perlite, air passages are formed in the growing media thereby providing excellent aeration.

Horticultural perlite is available in several different grades. The coarse sand size has been used for many general gardening and horticultural applications, but the finer grades work best when used outdoors.

So now you know.

For related articles click onto:
The Secrets to Growing Bonsai
What is Air Layering?
WHAT IS HOMEOSTASIS
What is Perlite?
What is Poison Oak?
What is a Stumpery?
WHAT IS WASABI?

HOW TO GROW THE CALLA LILY

Calla lilies - Zantedeschia species


If you want to bring a touch of the tropics into your garden, then you could do a lot worse than growing the stunningly gorgeous calla lily. A native to southern Africa, calla lilies - Zantedeschia species, are a group of species mainly derived from Z. albomaculata,  and despite the name are not actually lilies, or even true callas!

Calla lily
Calla lilies are in fact a genus of half-hardy herbaceous flowering plants from the family Araceae.

The eye-catching and unusually shaped flowers are borne on a spadix at the end of a long stem and surrounded by a large, coloured spathe.

So exquisite and detailed are the pigments produced on the spathe that you can be forgiven for thinking that they have been airbrushed by some unscrupulous grower!

As exotic as calla lilies looks they are relatively easy to grow. The secret is all in the watering!

Growing Calla lilies

You can purchase calla lilies as either pot grown plants in early summer or as sections of root (rhizomes) in the spring. As rhizomes, grow them in 6-10 inch pots containing John Innes 'No 2'. Cover the rhizomes with 2-3 inches of compost and give them a thorough watering. From then on, keep them just on the moist side until the new growth appears.

Calla lily bulbs -  mylifeasalily.wordpress.com
From this point water moderately, gradually increasing the amount as the plants grow. When the plants are in full leaf you need to water copiously - never let the roots dry out! Feed at weekly intervals from May until August with a liquid soluble fertiliser.

Once flowering is over, gradually withhold the water and give none to Z. pentlandii, Z. elliottiana and Z. rehmannii after mid July.

Zantedeschia pentlandii will need a winter temperature of above 10-12 degrees Celsius to survive, while Z. rehmannii will need 7-10 degrees Celsius.

How to propagate Calla lilies

You can divide the rhizomes and replant, or you can take off-sets when repotting is carried out. Pot Z. rehmannii rhizomes or offsets in 4 inch pots, or three to a 6 inch pot. Place propagation material from the other varieties singly in 6 inch pots containing John Innes 'No 1 or 2' compost.

For related articles click onto:
HOW TO GROW THE CALLA LILY
HOW TO GROW THE CROWN IMPERIAL LILY
HOW TO GROW THE GINGER LILY FROM SEED
HOW TO GROW THE GIANT HIMALAYAN LILY FROM SEED
Paeonia lactiflora 'Bowl of Beauty'
SPIDER LILY - Hymenocallis species and cultivars
THE HISTORY OF THE CANNA LILY

THE BLEEDING TOOTH FUNGUS

The Bleeding Tooth fungus - Hydnellum peckii
The Bleeding Tooth fungus - Hydnellum peckii 


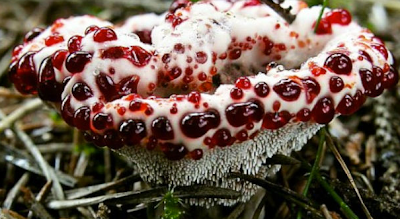
The Bleeding Tooth fungus - Hydnellum peckii is a rather gruesome looking fungus found in North America, Europe, and more recently discovered in Iran and Korea.

Its most outstanding feature is the blood-like substance that it exudes from the pores, and while it is not toxic, it tastes so peppery and bitter that it is rendered unpalatable! Of course, discovering this information would have required some poor soul to eat it, or at least attempt to eat it - I sorely hope they got paid!

The Bleeding Tooth fungus - Hydnellum peckii
The Bleeding Tooth fungus - Hydnellum peckii 
The 'blood' is only really produced by the fungus during its juvenile stage, and contains a pigment known to have anticoagulant properties.

The bleeding tooth fungus is found growing solitary, scattered, or clustered together on the ground under conifers. Research has shown that it has a mutualistic relationship with the roots of certain conifer species, in which the fungus exchanges minerals and amino acids extracted from the soil for fixed carbon from the host.

Remember, while it may look a bit like a jam filled cake - it is not a cake so don't try eating it. The end.

For related articles click onto:
CEROPEGIA AMPLIATA - The Bushman's Pipe
DEVIL'S FINGERS - Clathrus archeri
HOW TO GROW THE BUSHMAN'S PIPE - ceropegia ampliata
HYDNORA AFRICANA
THE GHOST PLANT - Monotropa uniflora
THE BLEEDING TOOTH FUNGUS
The Hooker's Lips Plant
THE LIZARD VINE
The Monkey Puzzle Tree - Araucaria araucana
Trachelospermum jasminoides
The Eyeball Plant

HOW TO GROW LOBELIA CARDINALIS 'QUEEN VICTORIA' FROM SEED

How to grow Lobelia cardinalis from seed


Native to northern United States, Lobelia cardinalis is an erect, clump-forming herbaceous perennial that can reach an overall height of up to 30 inches.

Lobelia cardinalis
It prefers a deep, fertile soil in full sun or partial shade.

So copious are it water requirements that it is often grown as a marginal pond plant, though it tends not to thrive in overly, waterlogged conditions.

Lobelia cardinalis tends to weaken after a couple of years growth, but it can be revitalised through propagated by division.

This method is best performed in March.

Be aware though that Lobelia cardinalis is a particular favourite of slugs and snails so make a point of putting adequate protection in place - organic protection of course.

Once the plant has died back in late autumn, cover with a heavy mulch to help protect it against the winter cold.

Growing Lobelia cardinalis from seed

Sow lobelia seed from late winter to mid spring on the surface of a good seed compost such as John Innes 'Seed and Cutting' and gently firm down. Place the seed tray in a sealed polythene bag, or a propagator at a temperature of 16-18C (61-64F).

Lobelia cardinalis new growth
Keep the soil damp but not wet. Do not exclude light as this aids germination which will usually take between 14-21 days.

When seedlings are large enough to handle, transplant and grow them on in cooler conditions until large enough to plant outdoors.

When the young lobelia plants are well grown and all risk of frost has passed, they can be acclimated to outdoor conditions over 7 to 10 days.

Transplant outdoors in a sheltered position in sun or semi-shade on reliably moist, fertile soil. Lobelia cardinalis copes well with boggy soils and can be planted at the edge of ponds and streams. Just not in the pond or stream.

Cut back old lobelia foliage in autumn and apply a dry mulch of bark chips or straw to protect the crown of the plant during winter.

Caution: Contact with the white sap may irritate the skin and eyes.

For related articles click onto:
ACANTHUS MOLLIS
HOW TO GROW LOBELIA FROM SEED
HOW TO GROW LOBELIA TUPA
HOW TO GROW LOBELIA TUPA FROM SEED
HOW TO GROW LOBELIA CARDINALIS 'QUEEN VICTORIA' FROM SEED
HOW TO GROW LUPINS FROM SEED
HOW TO GROW RUDBECKIA FROM SEED
HOW TO GROW IMPATIENS FROM SEED
The Monkey Puzzle Tree - Araucaria araucana
WHAT IS LOBELIA?

MONKEY FACE ORCHIDS

Monkey face orchids
Monkey face orchids


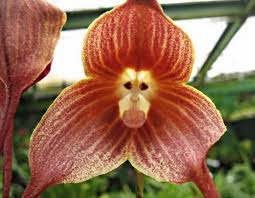
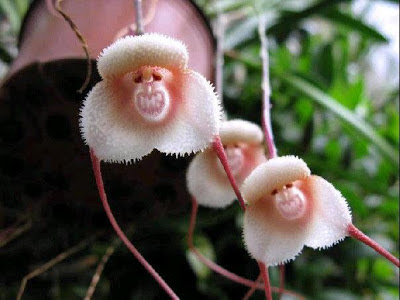
The first time you come across a picture of a monkey face orchid, you can be forgiven for thinking that you are looking at an image that has been subjected to photo editing. But I kid you not, Monkey face orchids are not only real, there are number of species - each with a different face!

Monkey face orchid
Monkey face orchid
Dracula simia, called also "Monkey Orchid" or "The Monkey-Like Dracula," is an epiphytic orchid in the genus Dracula.

As you can clearly see from the images within this post, the arrangement of column, petals and lip strongly resembles a monkey's face.

Incidentally, the genus name 'Dracula' refers to the strange characteristic of the two long spurs of the sepals, reminiscent of vampire fangs!

The orchid is in fact a recent discovery and was only named in 1978 by the botanist Luer. Research has discovered that the monkey orchid is part of a family containing over 120 species, mostly found in Ecuador.

Monkey face orchids
Monkey face orchids
The monkey orchid is extremely rare, and only a few lucky collectors have been able to habitat.

They are found only on the mountains of Ecuador and Peru at elevations of 1000 to 2000 meters above sea level.

Up in the cloud mountains the monkey orchid can flower at any time – it is not season specific.

The plant blooms at any season with a single 5cm successive flower. These fascinating flowers are also endowed with an unusual fragrance, the scent of a ripe orange.

For related articles click onto the following links:
CEROPEGIA AMPLIATA - The Bushman's Pipe
CHARLES DARWIN'S FAVOURITE ORCHID - Catasetum species
DEVIL'S FINGERS - Clathrus archeri
HOW TO FEED ORCHIDS
HOW TO GROW THE BUSHMAN'S PIPE - ceropegia ampliata
HOW TO REPOT AN ORCHID
HOW TO WATER ORCHIDS
HOW TO GROW THE HYACINTH ORCHID - Bletilla striata
HYDNORA AFRICANA
THE FLYING DUCK ORCHID
MONKEY FACE ORCHIDS
SCHOMBURGKIA EXALTATA
THE BEE ORCHIDS
THE BUTTERFLY ORCHID - Psychopsis papilio
THE EYEBALL PLANT - Actaea pachypoda
THE GHOST PLANT - Monotropa uniflora
THE 'HOOKER'S LIPS' PLANT
THE LIZARD VINE

COLEUS


It's not something I usually admit to, but I have always had a soft spot for Coleus plants. In fact, ever since I first came across them as a young and naive plant area assistant I have been fascinated by the richness of their exotic foliage. Why? Because Coleus are one of those rare plants that can genuinely compete with the vibrancy of tropical flowering plants just through the luxuriousness and colour of its leaves.

Coleus are native to native to tropical Africa, Asia and Australia and belong to the Lamiaceae family. Surprisingly, this makes it closely related to that old English favourite - the Stinging nettle! Although Coleus are often used in 'blanket bedding' schemes, they are in my option used far more effectively as specimens providing ornamental impact in tropical effect planting schemes.

Coleus border
Strictly speaking, within the scientific community Coleus are no longer called Coleus as are in fact correctly known as Solenostemon scutellarioides - scutellarioides means 'shield-shaped'. Be that as it may, the name 'Coleus' is still widely used by horticulturists and gardeners.

Despite their tropical looks, Coleus are relatively easy to grow and will suit a moist well-drained soil. Depending on the cultivar, they can typically grow between 18 inches and 3 ft tall. They are prefer a warm, sunny position, and in mild climates can usually be kept as perennials.

In colder, northern European climates, coleus are grown as annuals as they are not frost hardy and become leggy with age due to lower light levels compared to their native lands. Of course, you can encourage a more bushy habit in leggy plants by simply pinching back growing tips. The colours of the leaves are typically more intense in shade than in full sun, and will require less watering.

Propagation

Coleus cuttings
When growing from seed, you will need to sow Coleus in January in order to obtain large enough specimens to plant out when the weather breaks. To begin with, fill a seed tray with a good quality compost such as John Innes 'Seed and Cutting'. Then simply sprinkle seeds on the surface soil and press down.

The seeds need light to germinate, so place the seed tray in a bright position. In order to keep the seeds moist, cover the with clear plastic, or mist seeds daily. The emerging seedlings can show colour in as little as two weeks.

Regarding the most popular coloured cultivars, these are best propagated by means of 3 inch long tip cuttings taken from non-flowering shoots, taken in March or August.

Root the cuttings singularly in 2 inch pots containing John Innes potting compost at a temperature of 16-18 degrees Celsius.

Once rooted, the cuttings can be potted on into successive pot sizes until they reach their final 6-7 inch pot. Once the threat of frosts are over and night temperatures reach no less that a steady 10 degrees Celsius.

For related articles click onto:
COLEUS
COLEUS 'Palisandra'
HOW TO GROW COLEUS FROM SEED
HOW TO GROW CORN FLOWERS FROM SEED
HOW TO TAKE CUTTINGS FROM COLEUS

GERANIUM PRATENSE 'Johnson's Blue'

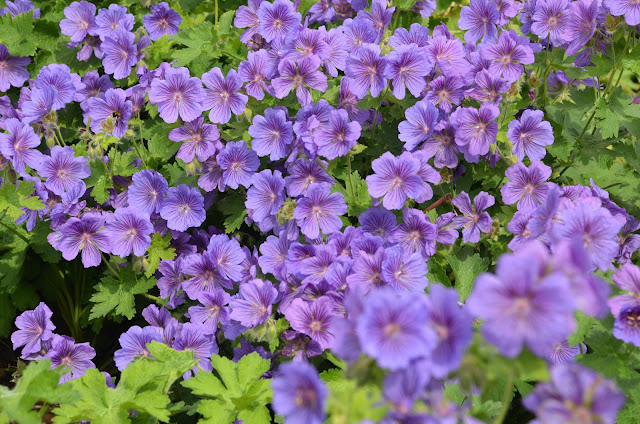
Geranium pratense 'Johnson's Blue' in full bloom
Geranium pratense 'Johnson's Blue' 


I will fully admit that I am not a huge fan of herbaceous borders, and therefore it leads on that I am not particularly keen on herbaceous plants in general. But why? Well, I am not keen on small flowers, plants that require more than their fair share of maintenance, and anything that looks as though it belongs in a cottage garden. For me, a cottage garden means untidiness!

Of course, as with any rule there are some exceptions, and while Geranium pratense 'Johnson's Blue' isn't one of them, I just can't help but admire how good it is as an ornamental plant. As an extra benefit, the bees love them.

Geranium pratense 'Johnson's Blue' with bees on the blooms
Geranium pratense 'Johnson's Blue' 
Commonly known as the meadow cranesbill, this geranium species is an English native so already it is off to a good start! It has a spreading habit and reaches a height of between 18 - 30 inches.

Hardy as old boots, Johnson's Blue has dark green, long stalked leaves which are five to seven-lobed and deeply divided. The violet-blue flowers are almost 2 inches across and explode into colour from June onwards.

For best results, plant Geranium 'Johnson's Blue' between September and March into any well-drained soil. They prefer sun or partial shade and while they are drought tolerant they will perform far better if you do occasionally water them.

Geranium 'Johnson's Blue' was awarded the Royal Horticultural Society's Award of Garden Merit in 1993 but this award has now been put forward for rescindment. Why? In all likelihood because of the similar, but even better performing - but less well known Geranium ‘Orion’

Geranium ‘Orion’

Geranium pratense 'Orion' flower blue
Geranium pratense 'Orion' - care of www.rhs.org.uk
Accepted as one of the finest of recent hardy geraniums, ‘Orion’ could be said to be like good old ‘Johnson’s Blue’ – only far far better.

Spreading to make excellent ground cover, large lavender-tinted blue flowers have purple veins and open in huge quantities all summer. The broad petals overlap to create bowl-shaped flowers and the white centres accentuate the colouring.

This impressive cultivar was awarded the Royal Horticultural Society's Award of Garden Merit in 2004.

Growing tips

Cut back the old flowering stems almost to ground level as this will help to encourage new, compact growth and a second flush of flowers.

Propagating Geranium 'Johnson's Blue' is easy. Just divide the plants between September and March, then plant directly into their final position.

For related articles click onto:
GERANIUM pratense 'Johnson's Blue'
HOW TO GROW GERANIUMS FROM SEED
HOW TO GROW HELXINE SOLEIROLII
HOW TO TAKE GERANIUM CUTTINGS
THE FIREWHEEL TREE - Stenocarpus sinuatus
The Giant Horsetail - Equisetum giganteum
The Monkey Puzzle Tree - Araucaria araucana
The Oriental Poppy
Trachelospermum jasminoides
WHY ARE MY GERANIUM LEAVES TURNING YELLOW?